Stacy Risenmay

Do-it-yourself projects and Home Decor

  • Home
  • About me
  • Our House
  • Project Gallery
  • PRESS
  • Contact Me
  • Videos
  • My Book

Wooden Cheese Crate {tutorial}

By Stacy 13 Comments

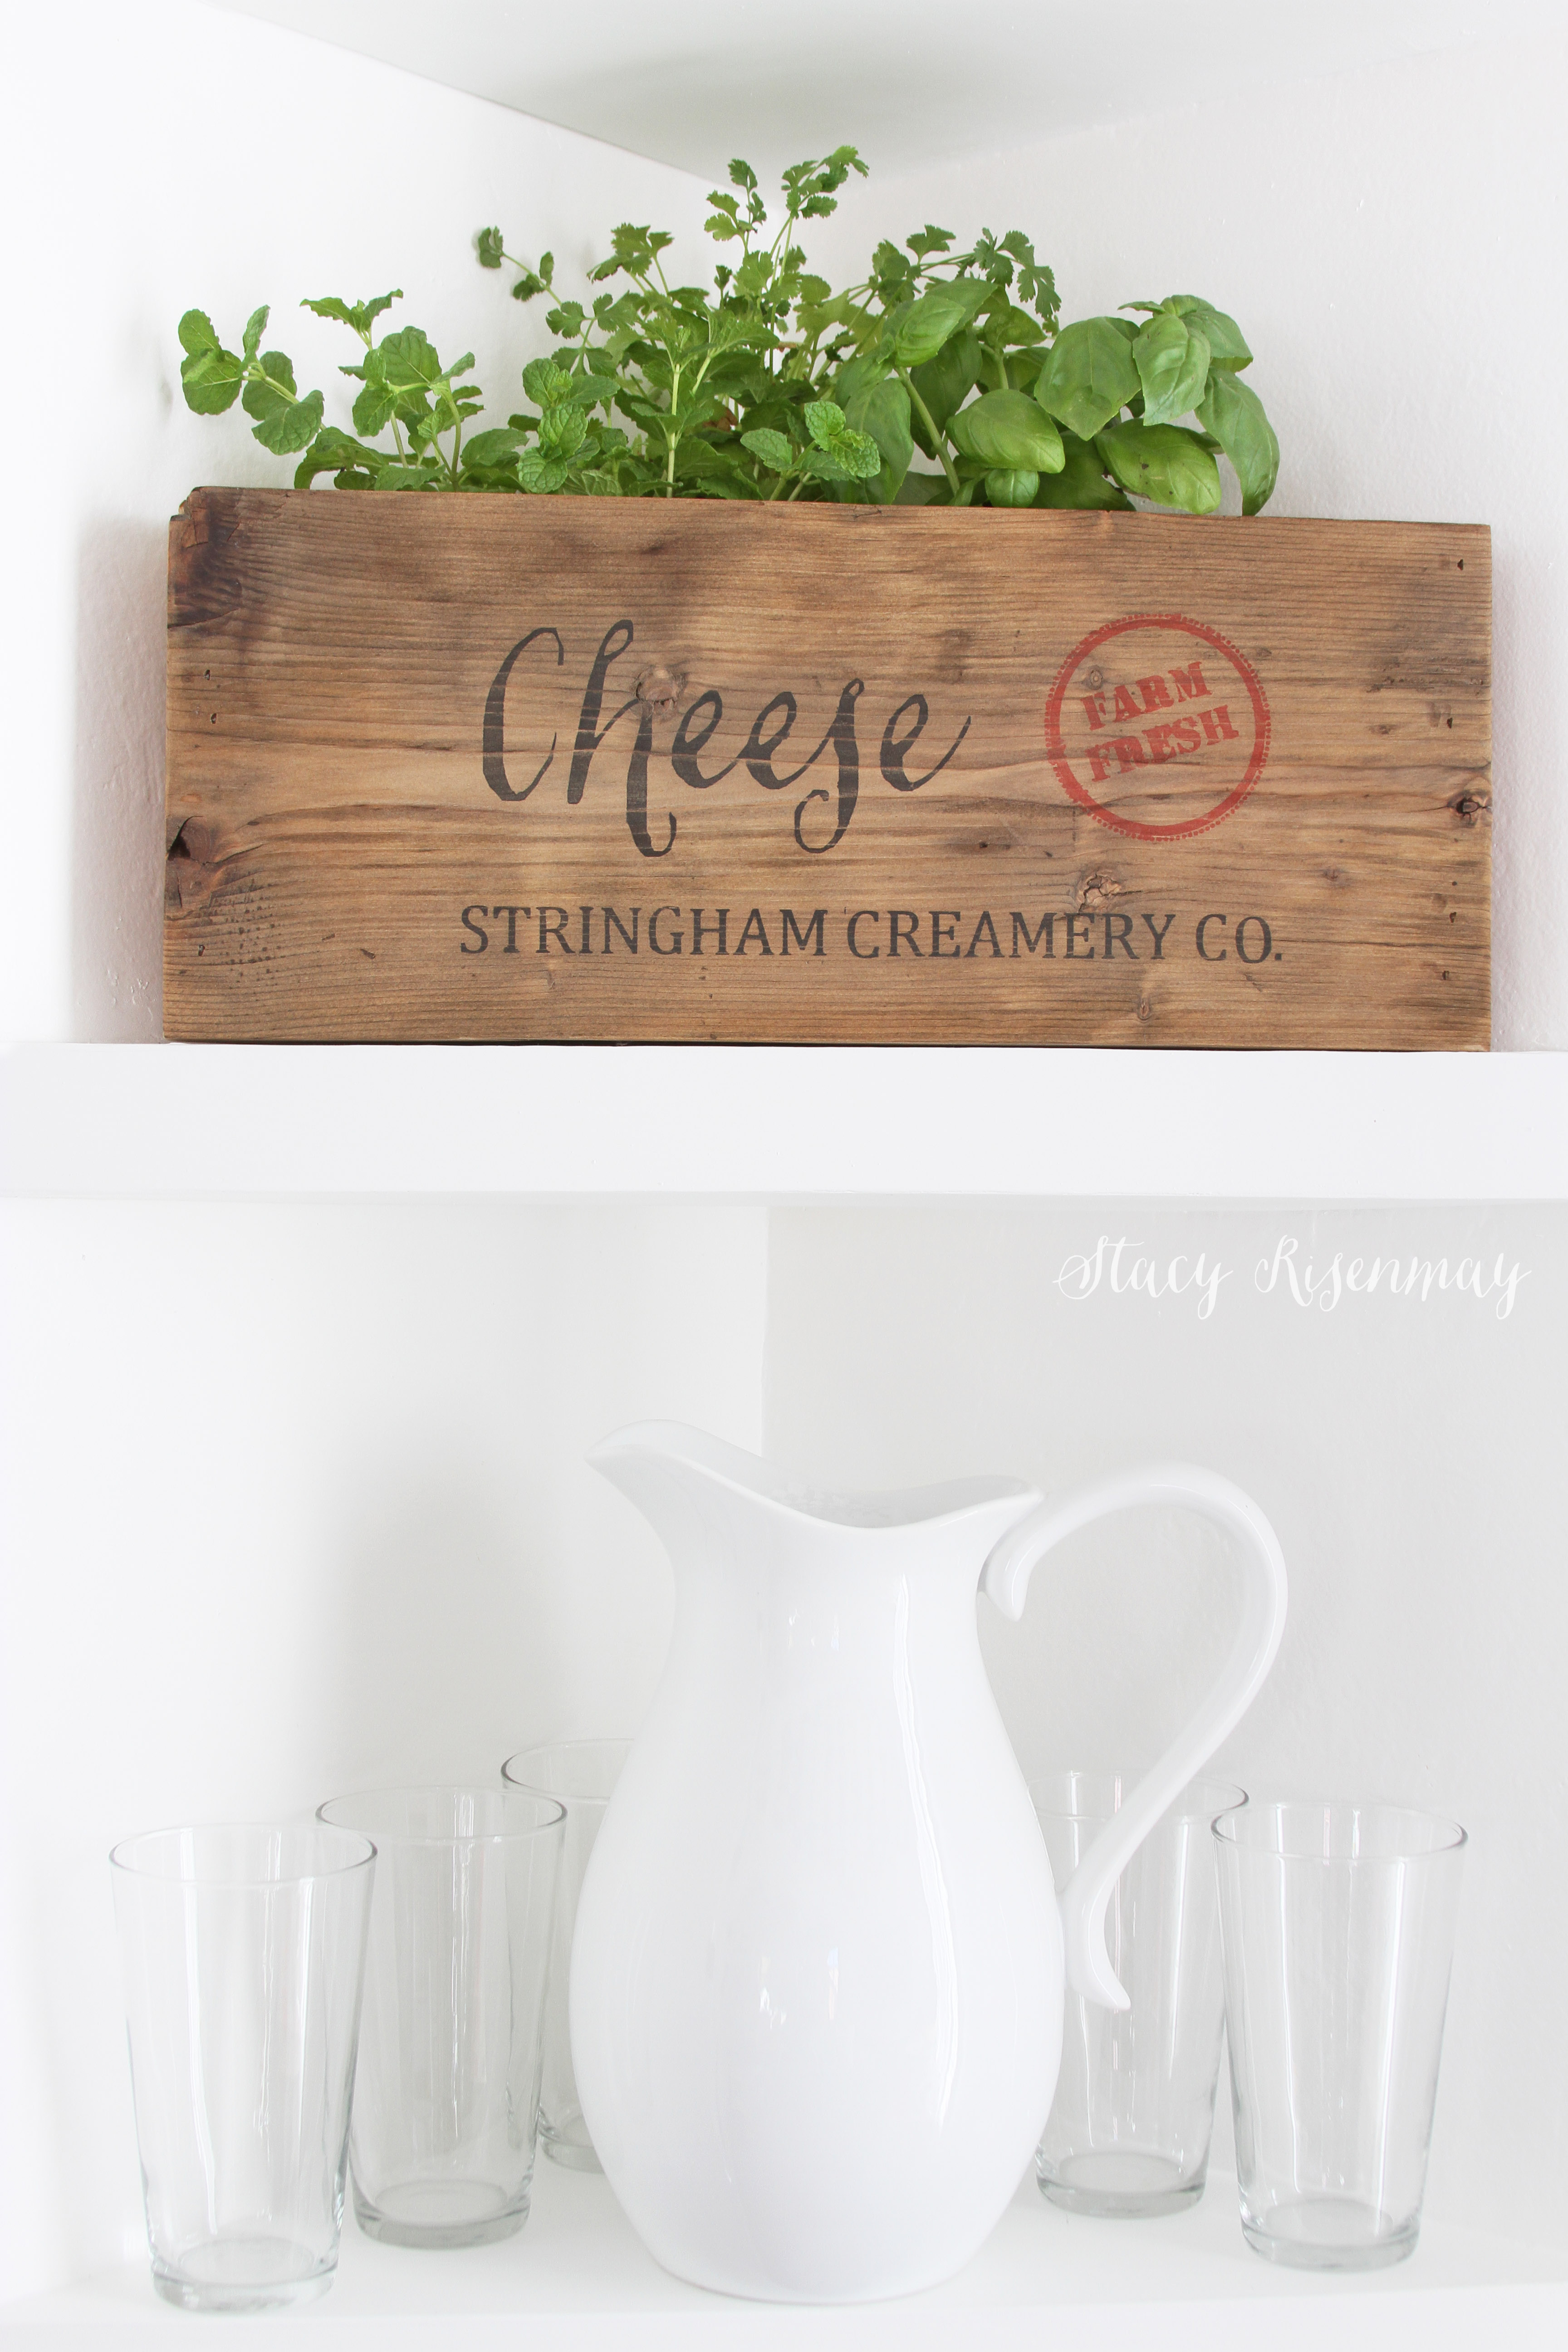
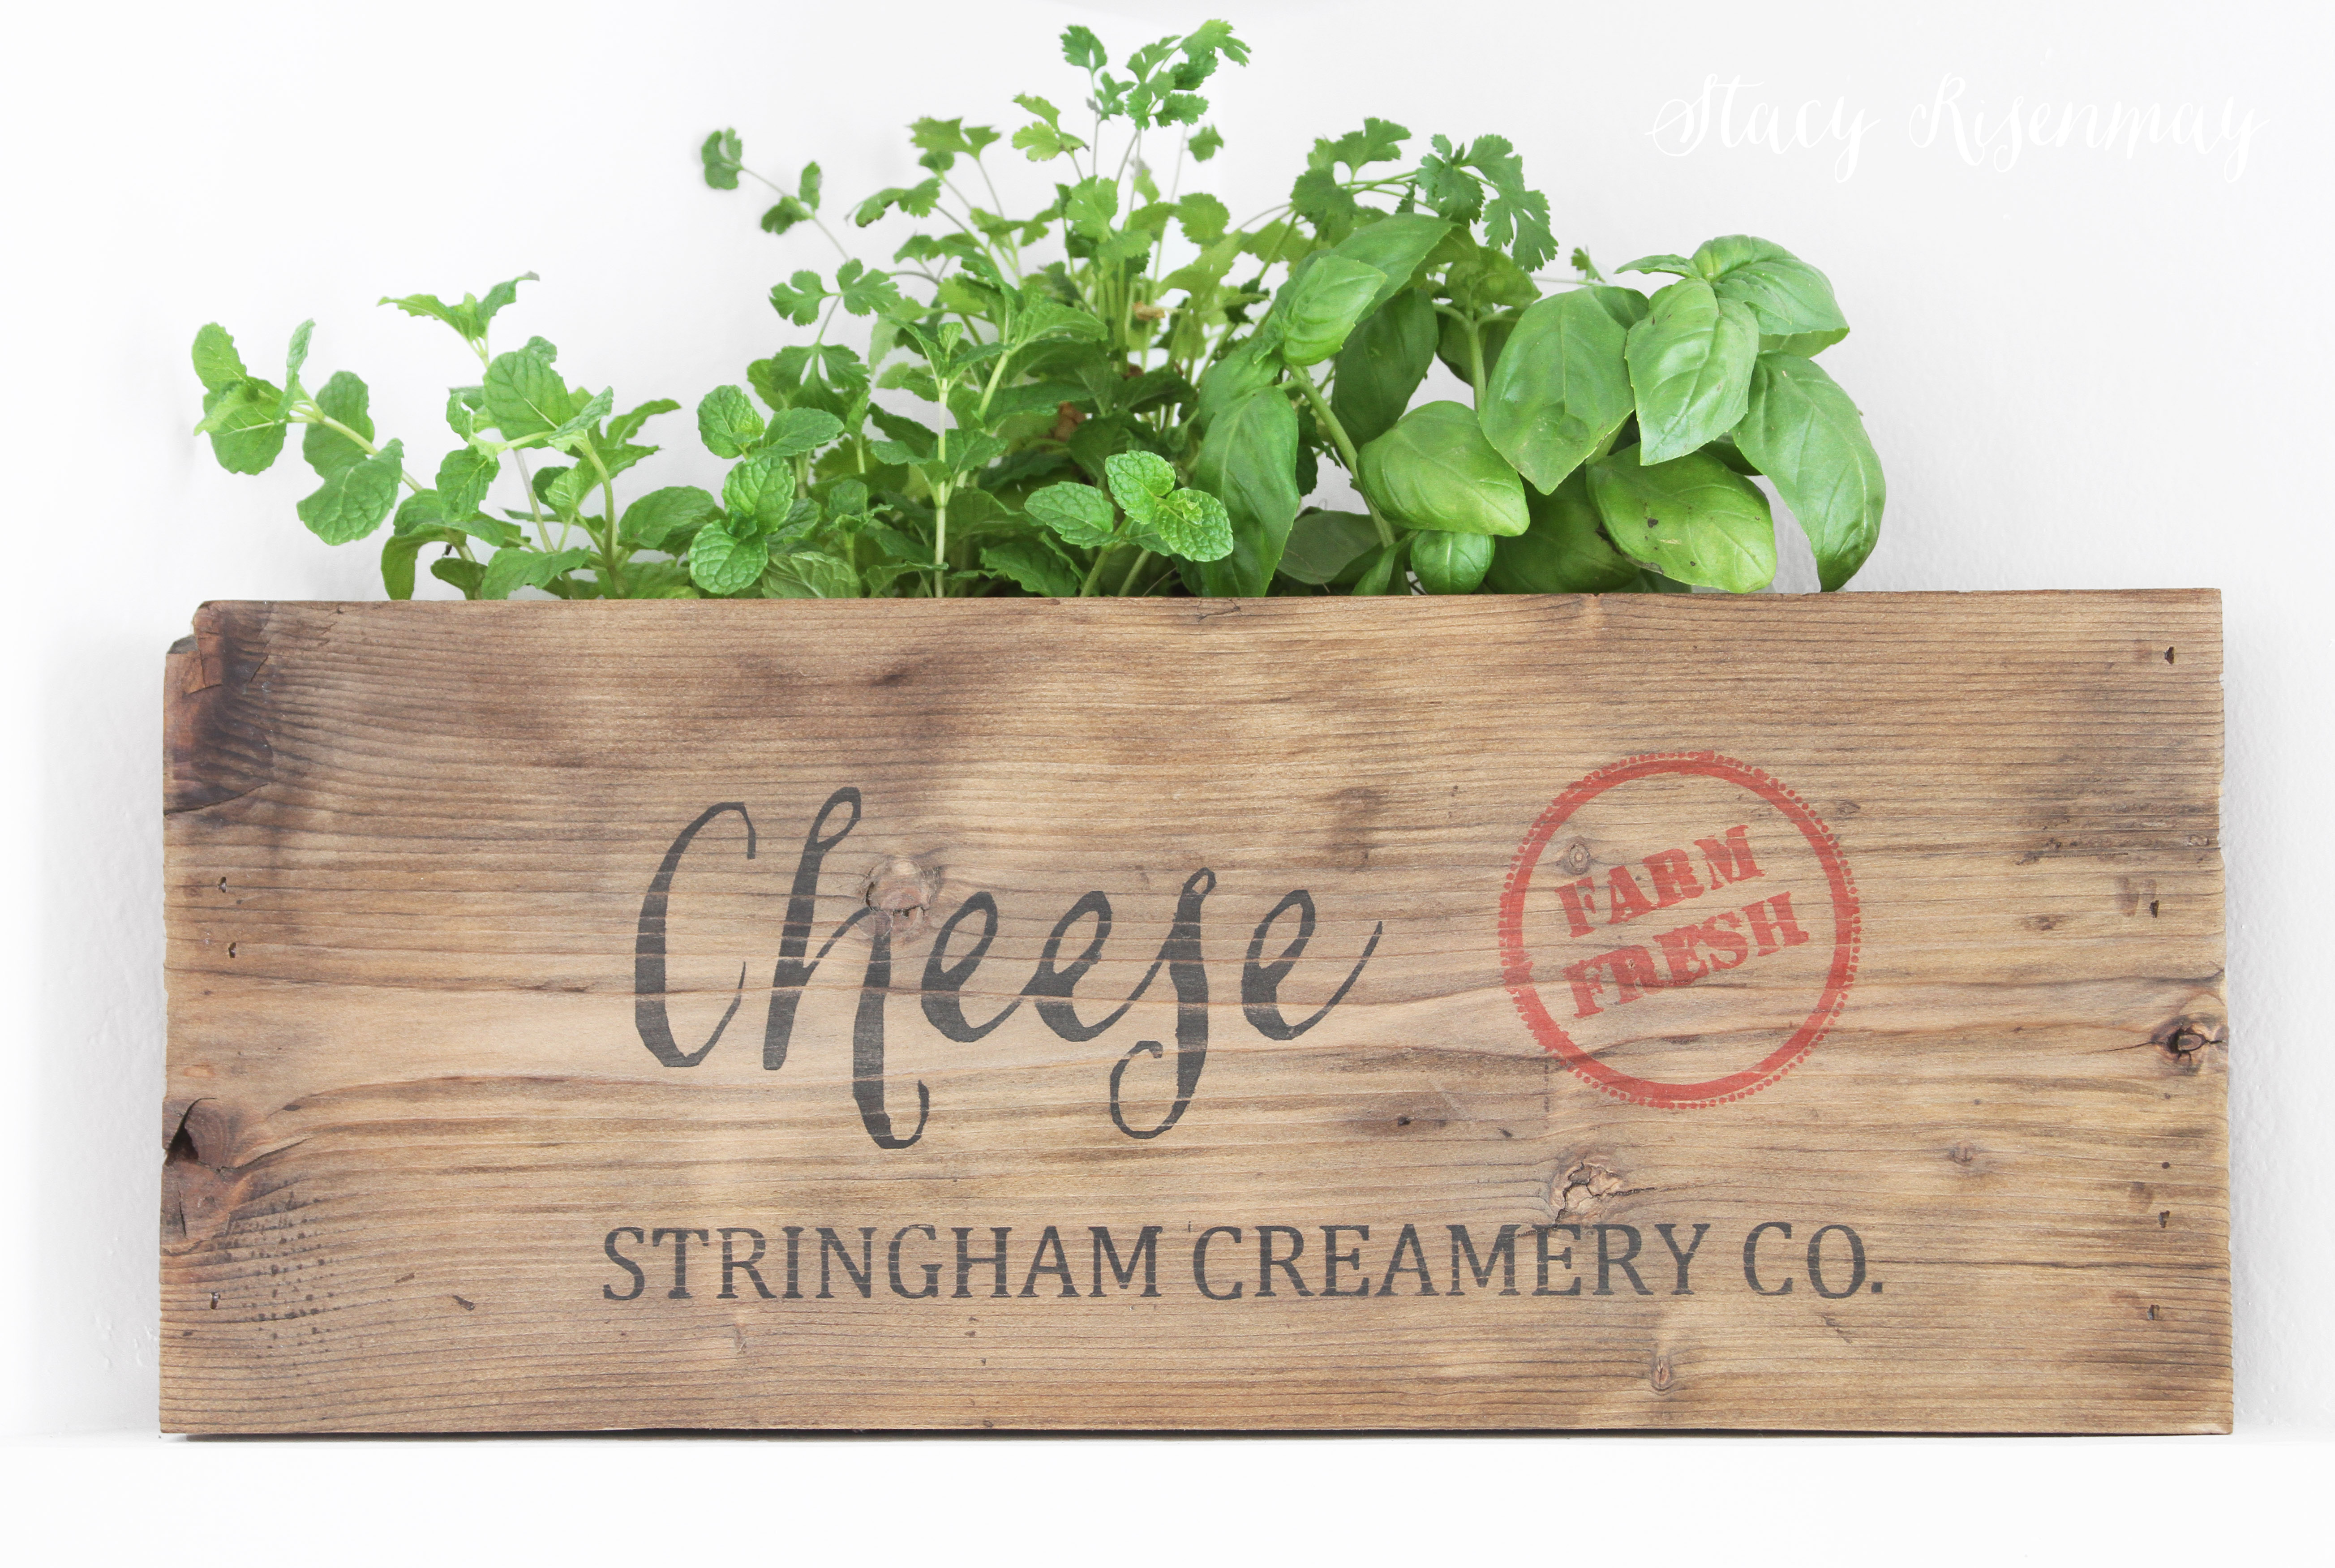
After playing around with different ways of styling these corner shelves that I built in my dining room and kitchen area I have finally found a way that I LOVE! Triangle shaped shelves can be tricky to style I have found. I really wanted a vintage wooden crate somewhere in my kitchen so I decided to make a triangle shaped one. It turned out better than I had hoped and was easier than I thought.
cheese crate with herbs on shelf


Since the crate was going to be up on a shelf and you wouldn’t see the joints, I decided to go the easy route and only cut two ends at a 45 degree angle. If this were a piece of furniture or something you would see the corners on, I would have figured out the angles and done mitered cuts on all corners.

To make a bottom simply set the triangle on a piece of wood and trace the inside with a jigsaw and nail and glue it into place.


cut wood for triangle crate


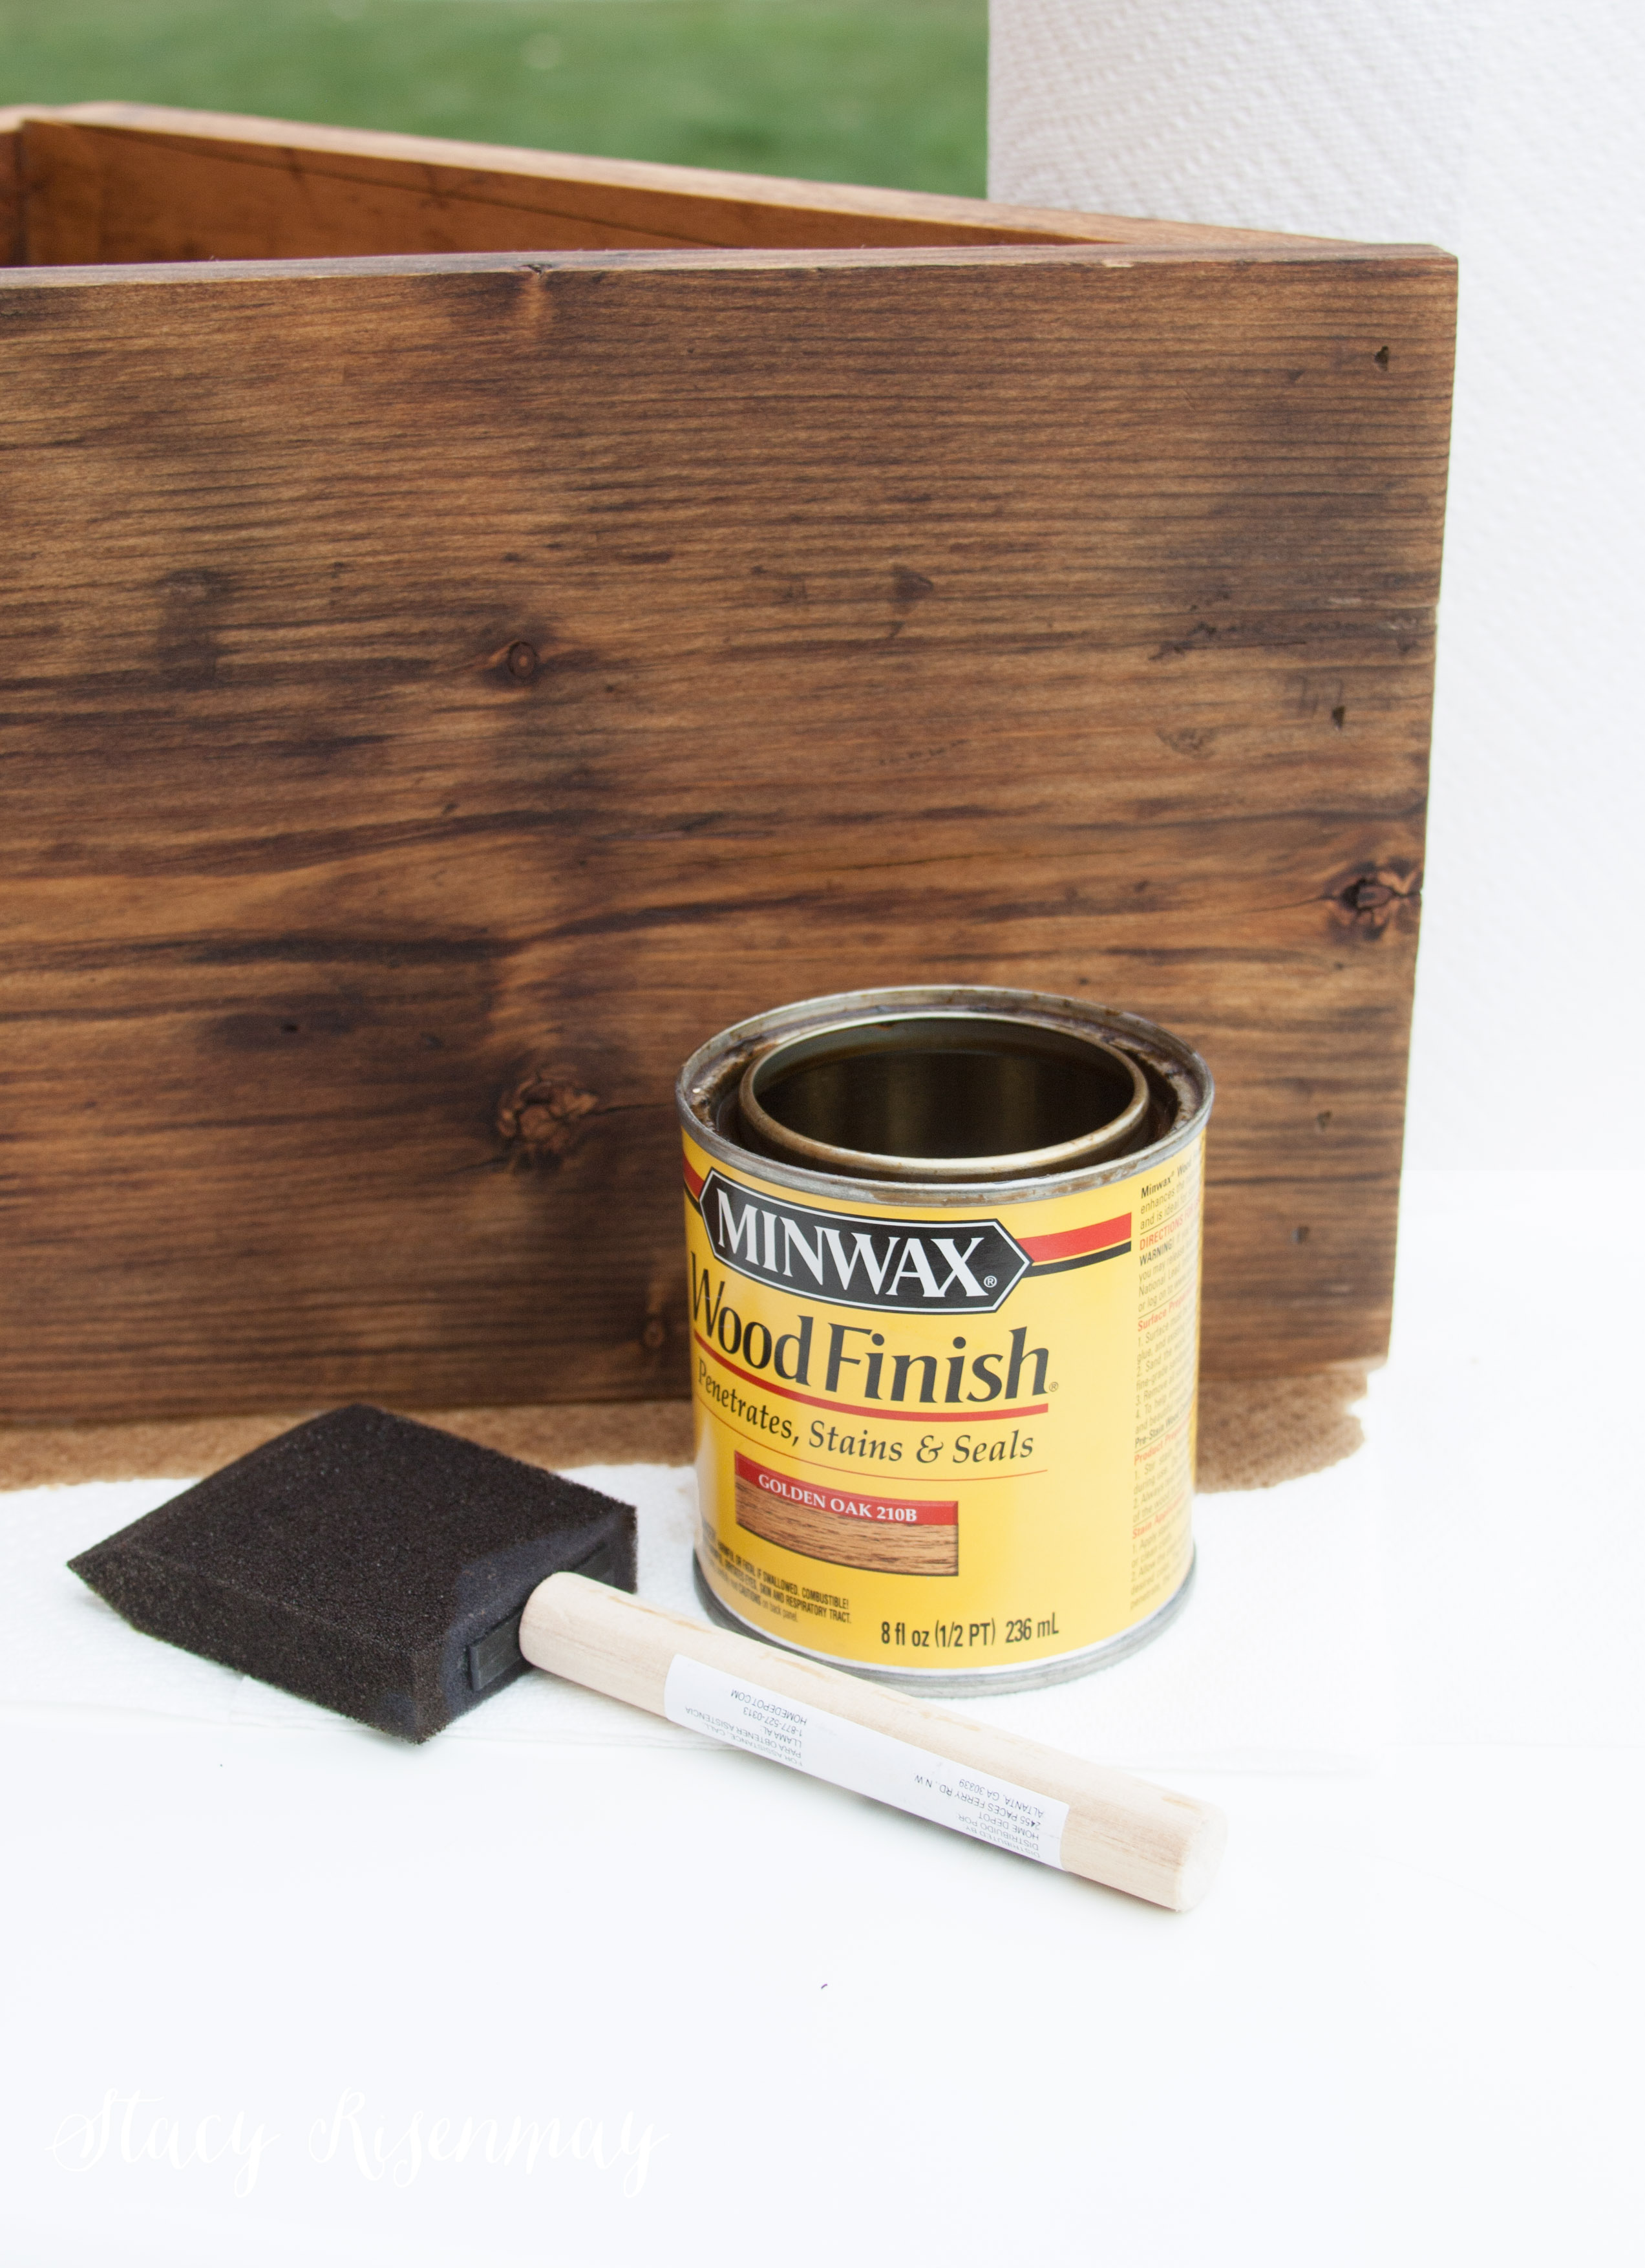
After gluing and nailing it together I sanded it smooth. I wiped off the dust and then stained it using Golden Oak from Minwax. I wanted it to be a lighter but warm color.


staining crate with golden oak


It looked great just stained and I could have left it as is, but I really wanted that vintage-y feel of an old crate.


wood crate before


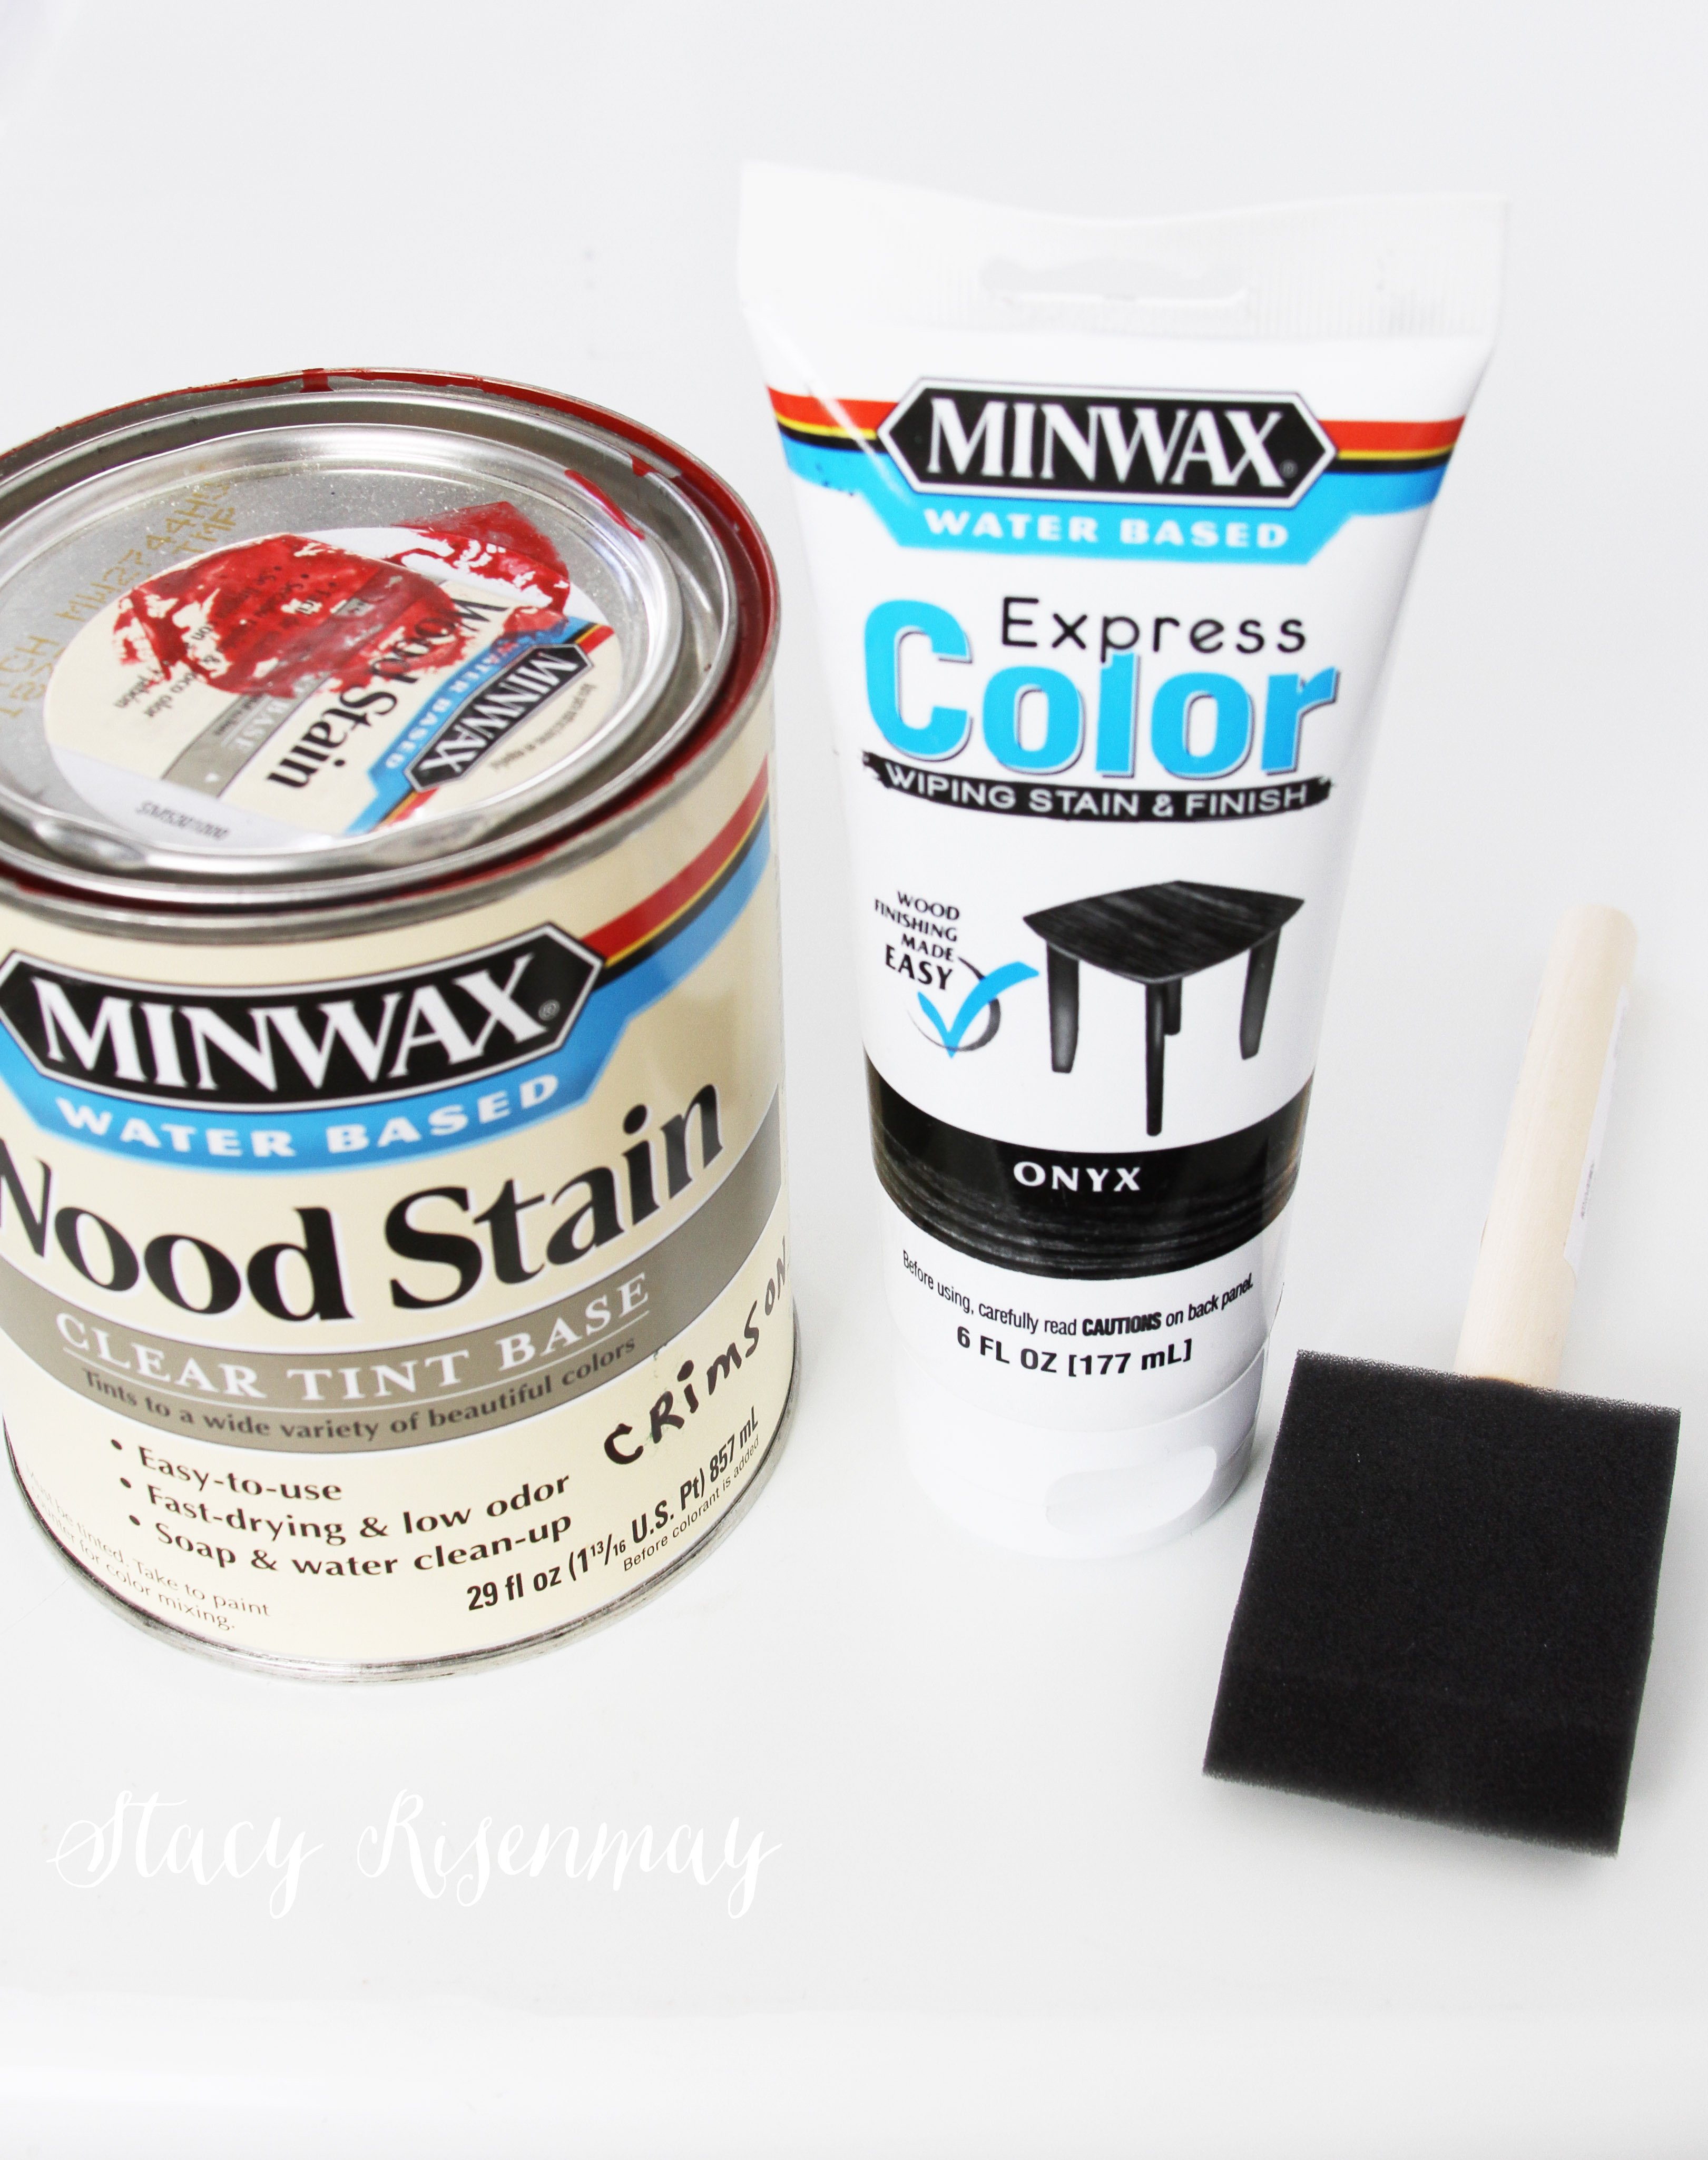
When looking at examples of old crates online the main colors of the stamped lettering seemed to be blue, black, and red. I went with red and black and I luckily had those colors of stain on hand.


color stain I used for stenciling


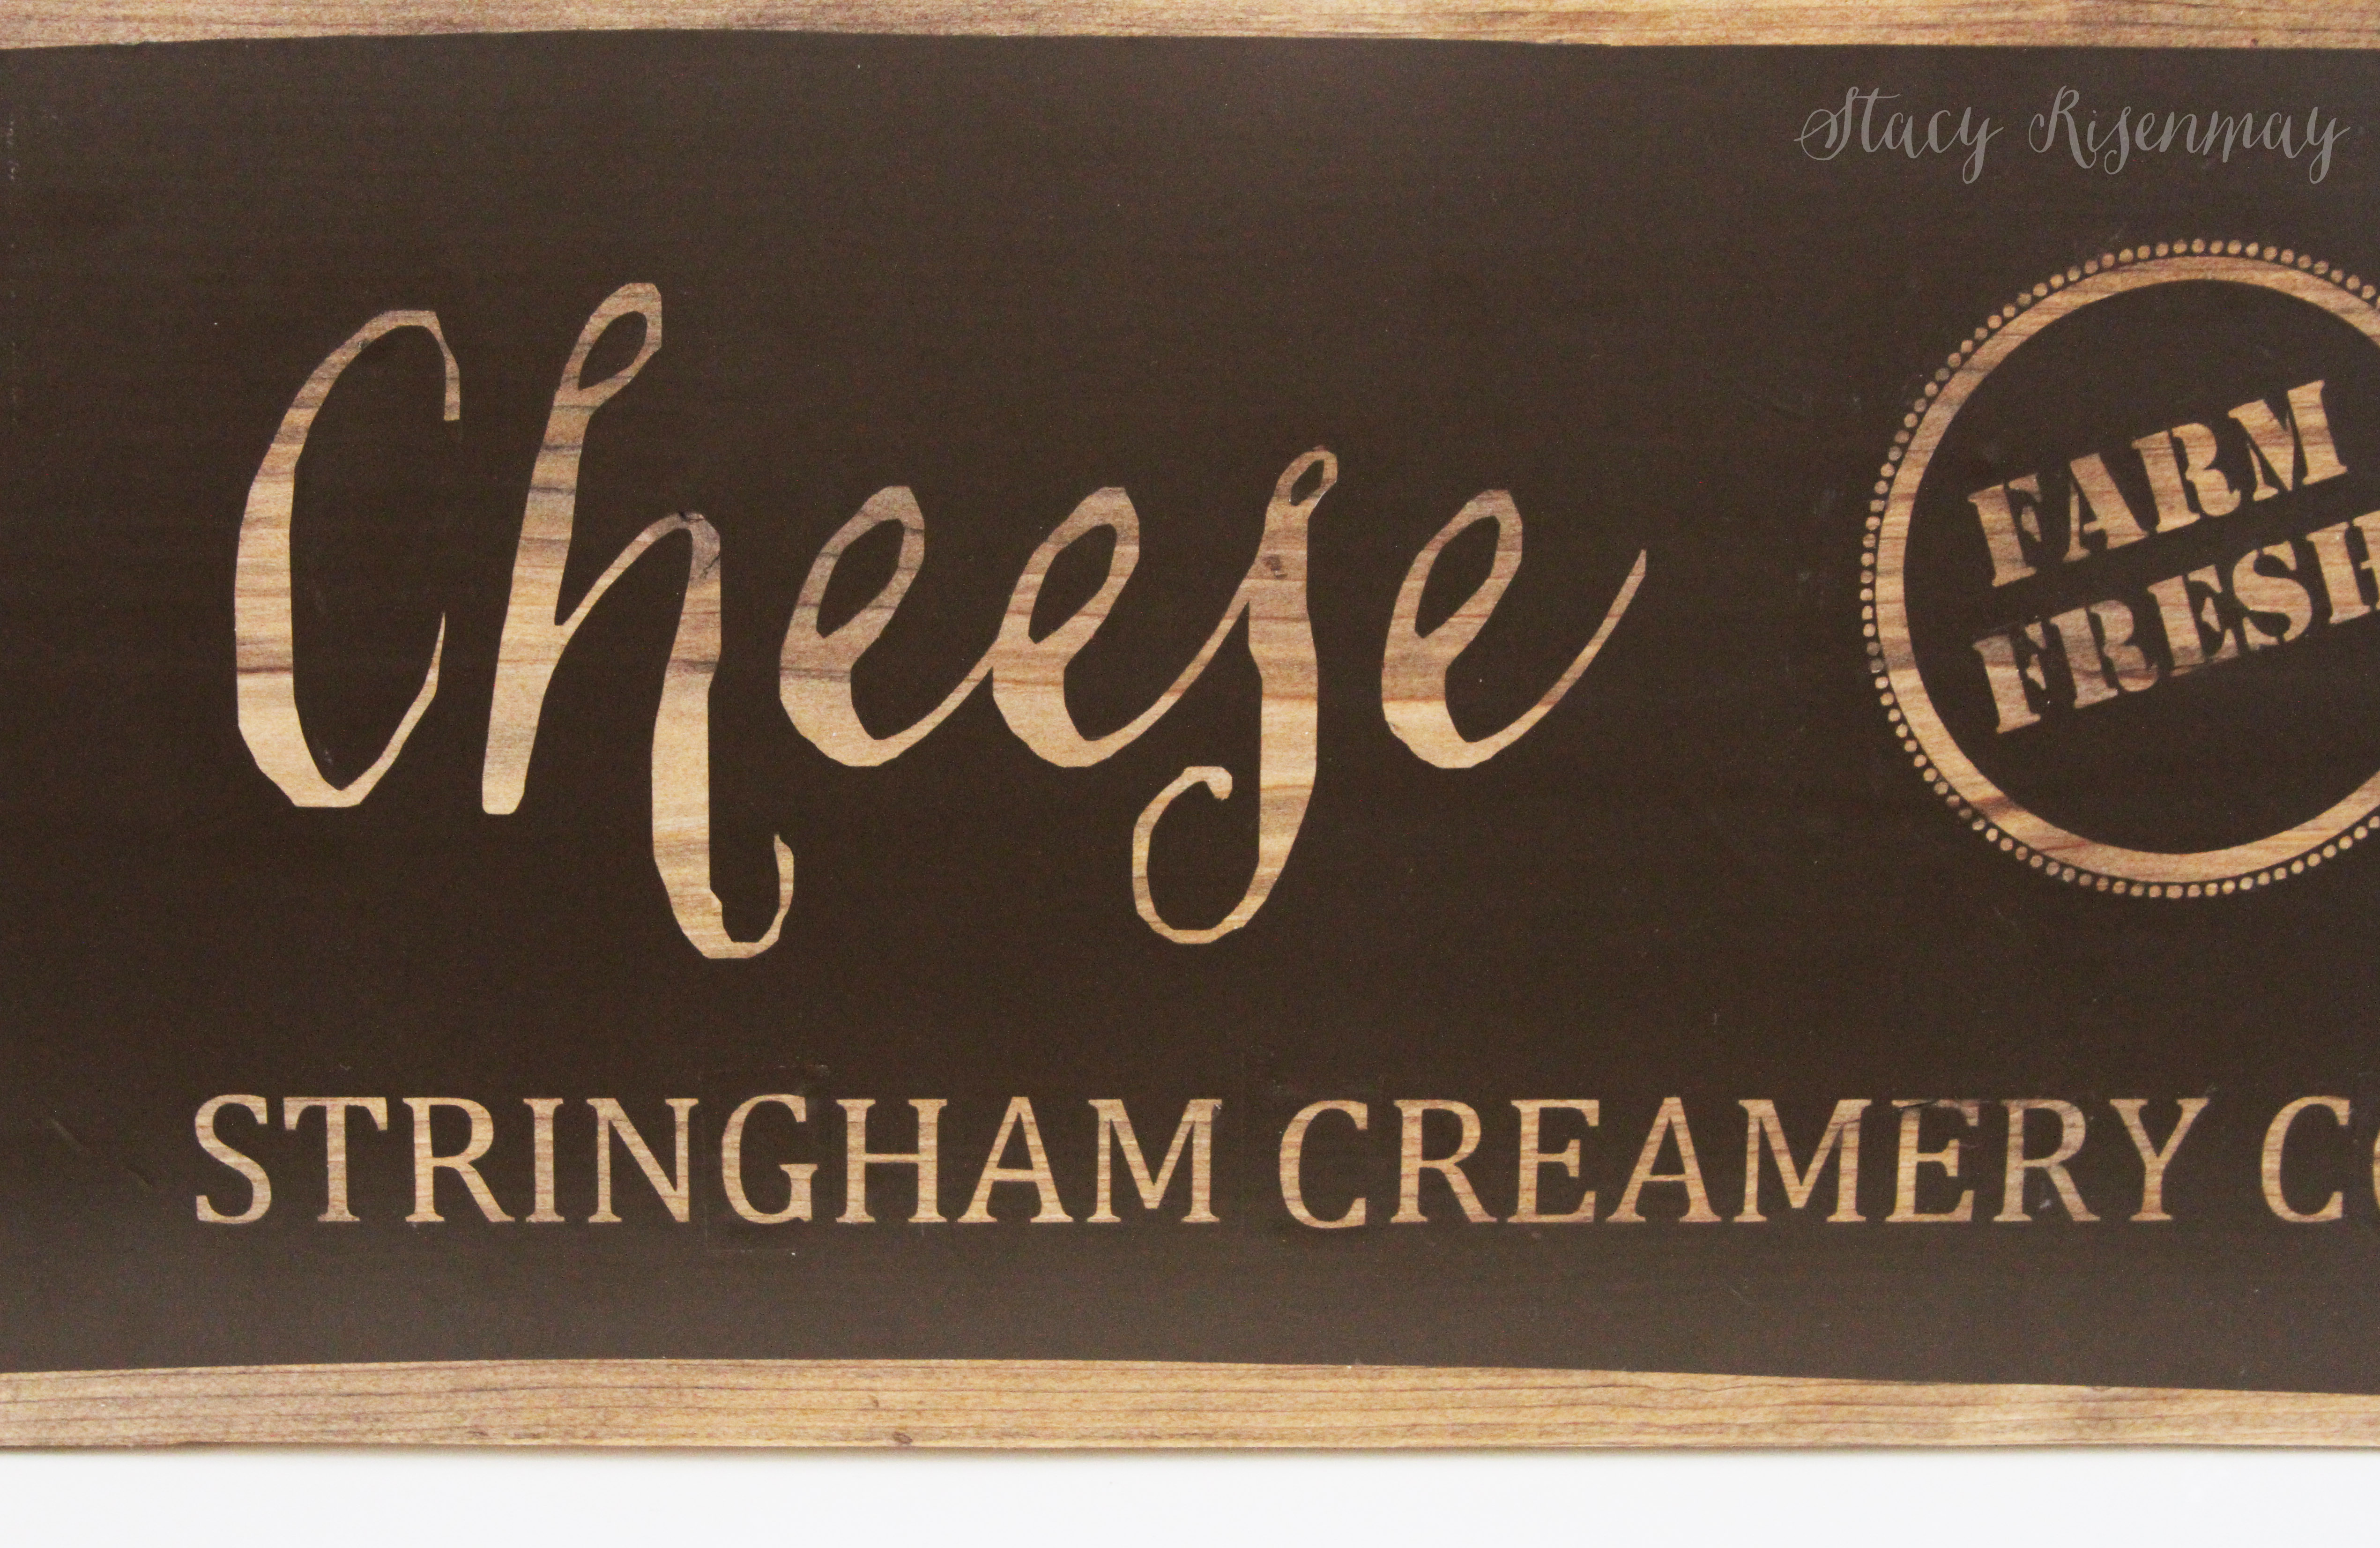
I cut a stencil out of vinyl using my Silhouette cutting machine.


vinyl stencil


Using a foam brush I gently dabbed the stain on and then used a paper towel to remove the excess.


stenciling lettering on wood crate


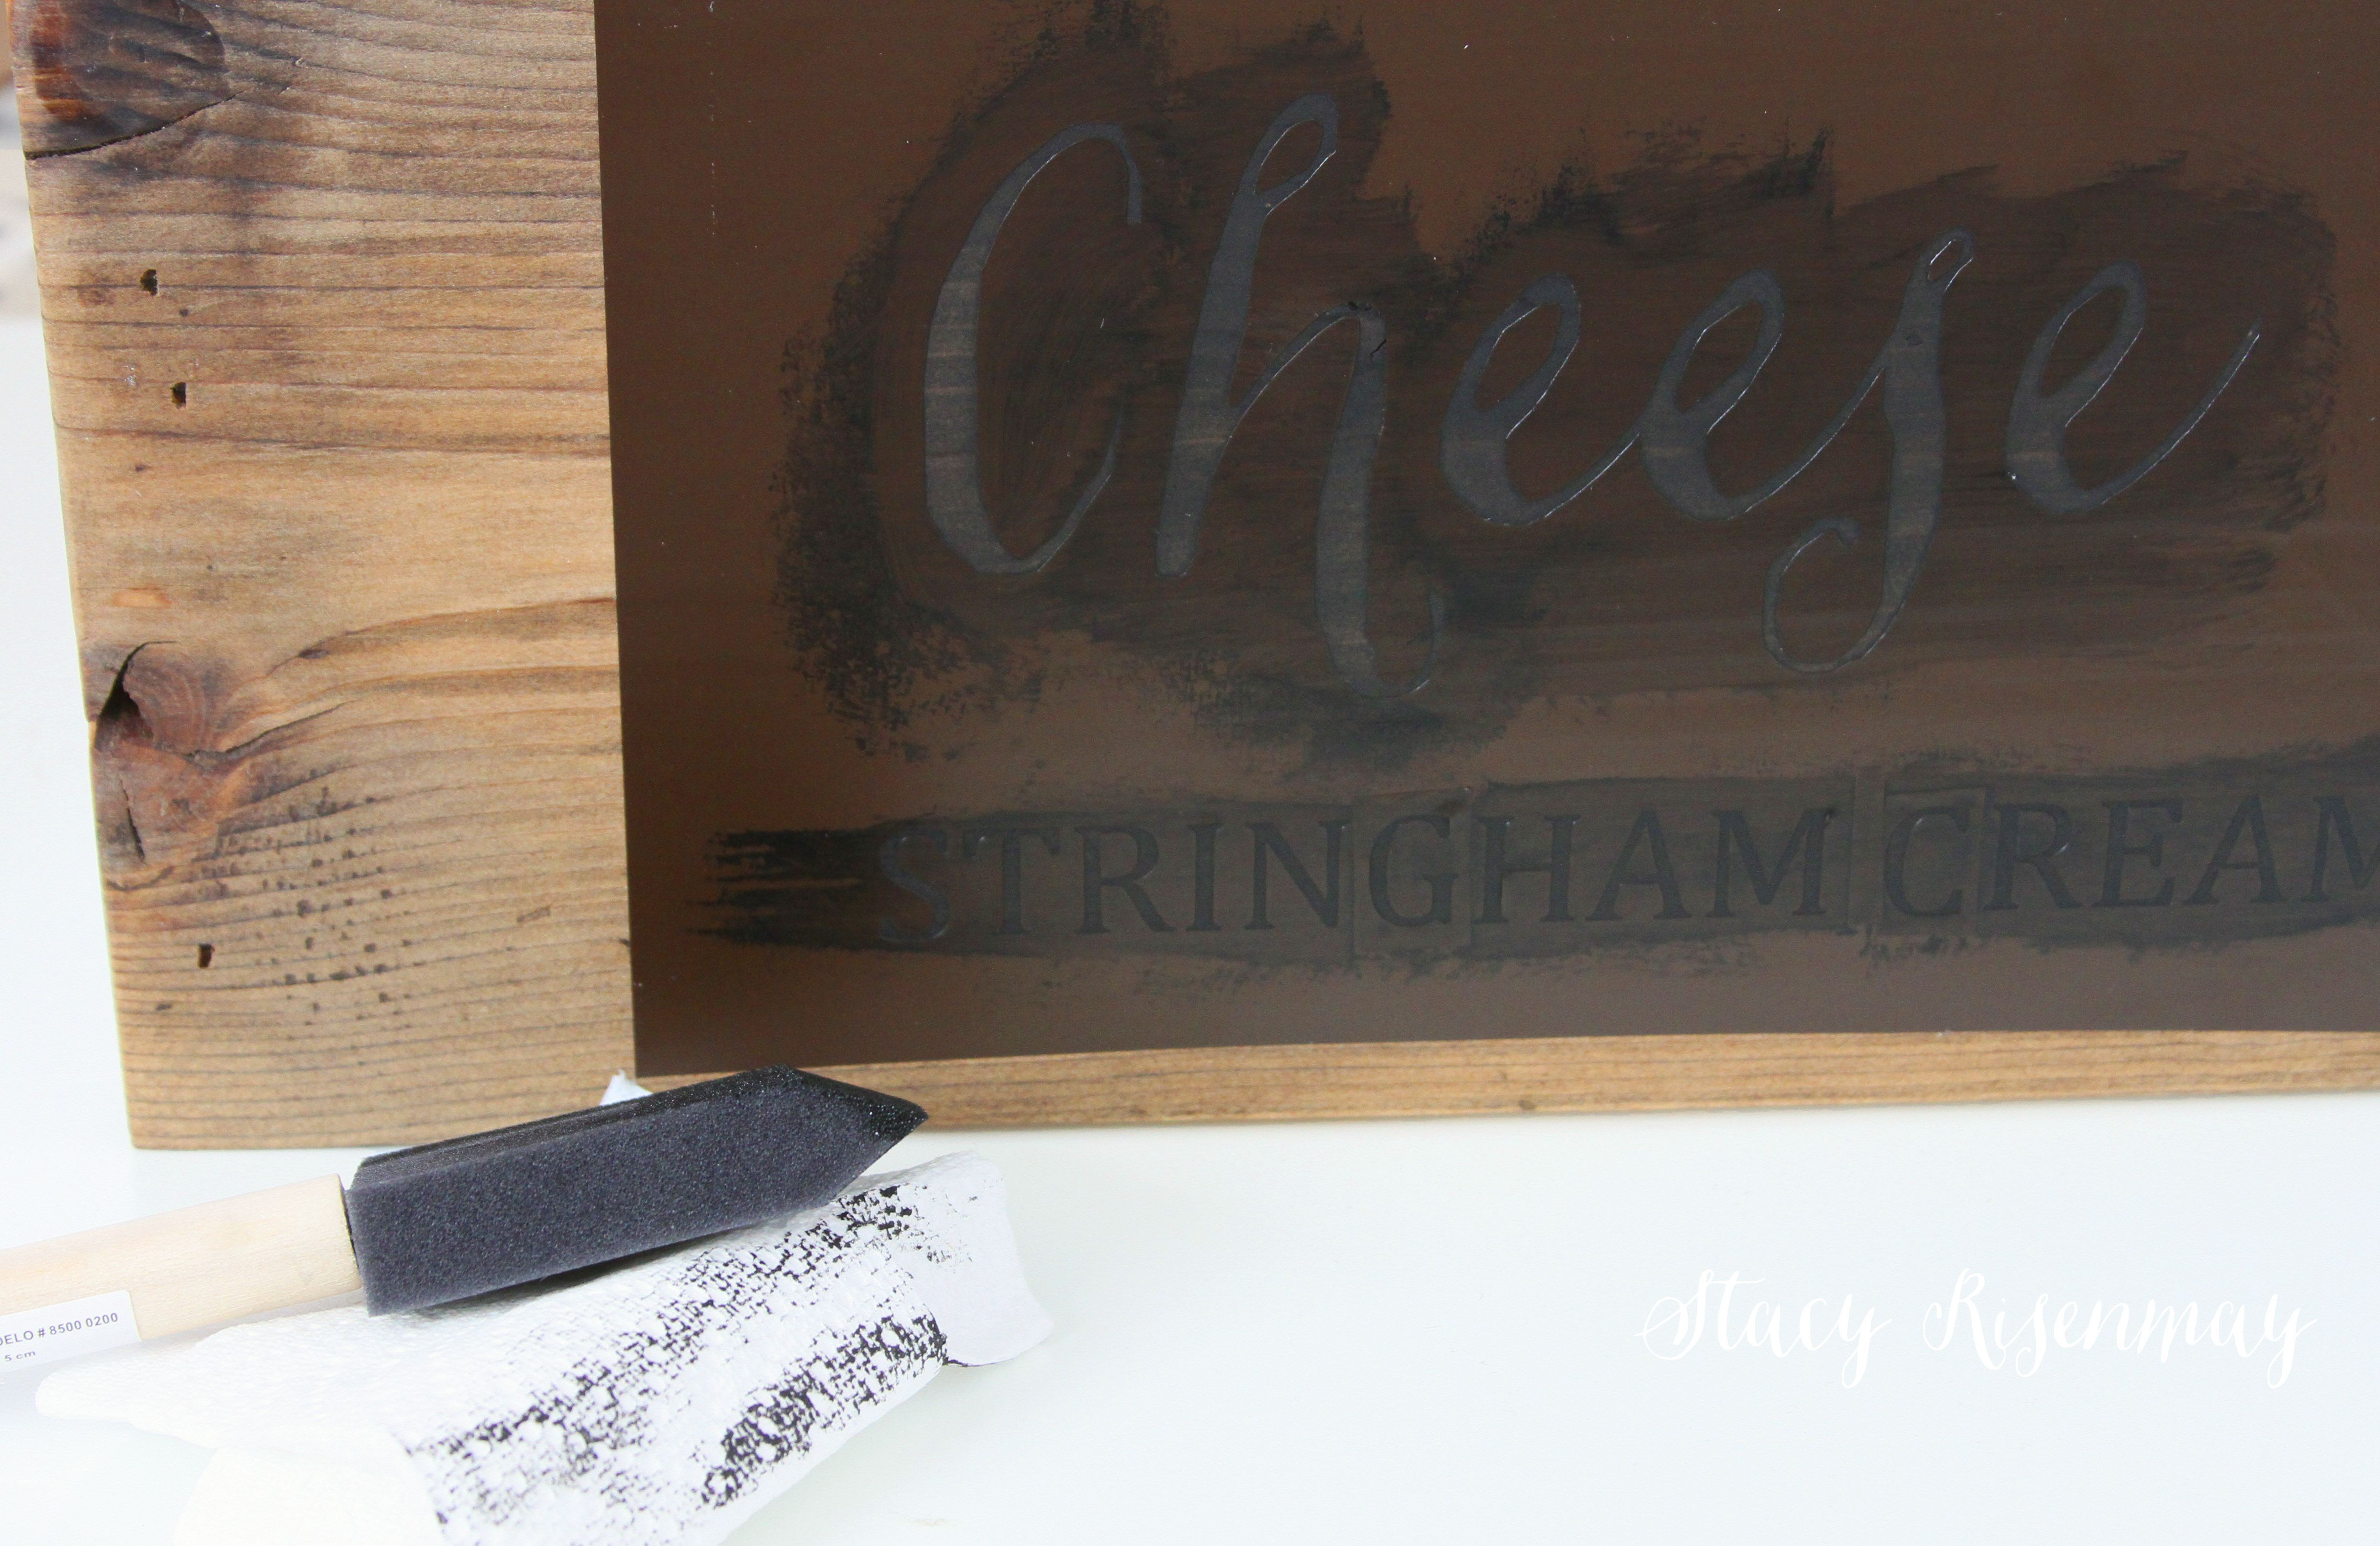
Once it dried I lightly sanded it with 22o grit sand paper to get that aged look. I like to set pots inside of crate rather than plant them in the crate itself. That way I can easily take out one pot at a time to use the herbs or to water as needed.


cheese crate used as planter for herbs


I will be revealing my finished dining room later this week. I am thrilled with how it all came together!


kitchen shelves with herbs in wooden cheese crate

You will also like:

  • Open Shelves In The KitchenOpen Shelves In The Kitchen
  • Bathroom Shelves!Bathroom Shelves!
  • How to Refinish A TableHow to Refinish A Table
  • Glass Light Shade Vase: Three Ways!Glass Light Shade Vase: Three Ways!
  • My Organized Pantry!My Organized Pantry!
  • Crate Planter TutorialCrate Planter Tutorial
  • Wood Bead PlanterWood Bead Planter
  • Welcome to my secret garden….Welcome to my secret garden….

Subscribe to My Blog!

Filed Under: DIY & Tutorials, Favorites, Power Tools, Staining 13 Comments

Comments

    Leave a Reply Cancel reply

    Your email address will not be published. Required fields are marked *

  1. linda(burlap+blue) says

    November 2, 2015 at 11:03 am

    This is AMAZING! Love how it turned out. Will have to pin this to try later!

    Reply
  2. Sarah says

    November 2, 2015 at 3:27 pm

    Oh my goodness! This is SO beautiful! Pinning.

    Reply
  3. Taryn @ Design, Dining and Diapers says

    November 2, 2015 at 3:39 pm

    This is absolutely adorable! I love the label you put on it :)

    Reply
  4. Debbie @ Refresh Restyle says

    November 2, 2015 at 5:28 pm

    love this idea! perfect!
    Debbie

    Reply
  5. KC @ The Real Thing with the Coake Family says

    November 2, 2015 at 6:37 pm

    Cute! I love the fact that it fits perfectly.

    Reply
  6. Claire @ A Little Claireification says

    November 2, 2015 at 7:53 pm

    I LOVE this!! And I am the queen of cheese so I MUST have one! Pinned!

    Reply
  7. Cath M T says

    November 3, 2015 at 7:19 am

    Adorable–great idea to make your own vintage crate. The whole thing is really clever.

    Reply
  8. Carole West @ Garden Up Green says

    November 3, 2015 at 8:31 am

    Love how this turned out, where did you get your stencil cutter?

    Reply
    • Stacy says

      November 3, 2015 at 8:44 am

      Thanks! I have a Silhouette brand cutting machine. It’s similar to a Cricut.

      Reply
  9. Julie Gavin says

    November 3, 2015 at 11:53 am

    I LOVE this!!!! Seriously gorgeous! I’ve not yet stenciled with my Silhouette but I have to find something to stencil and fast!

    What were the fonts you used?

    Reply
  10. Amy Anderson says

    November 5, 2015 at 5:07 pm

    I love that it goes in the corner – so smart!

    Reply

Trackbacks

  1. Talk of the Town #52 - Knick of Time says:
    December 27, 2016 at 5:56 pm

    […] DIY Vintage Style Cheese Crate […]

    Reply
  2. Talk of the Town #53 - My Repurposed Life™ says:
    December 28, 2016 at 6:15 am

    […] DIY Vintage Style Cheese Crate […]

    Reply
stacyWelcome to my blog where I share my adventures of fixing up our tiny 1938 cottage. Whether it is big or small, I think everyone should love their home and I don't think it takes a lot of money to make a space your own.
 

Search this site

categories

Subscribe

My Book

My Book

Copyright Not JUST A Housewife © 2018 | Web Hosting By RFE Hosting

To the Top

Welcome! Thanks for visiting.
I blog about fixing up our 1938 cottage. I post tons of budget friendly projects and by subscribing, you'll never miss a single one!
Your information will *never* be shared or sold to a 3rd party. Pinky promise :)
Welcome!
Hi! I'm Stacy and I blog about fixing up our 1938 cottage. Join the thousand of others who get my posts sent to their inbox for FREE!
Your information will *never* be shared or sold to a 3rd party.