
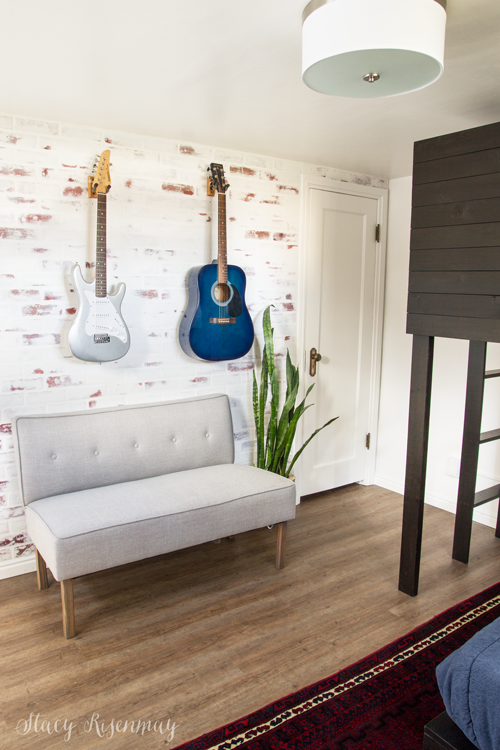
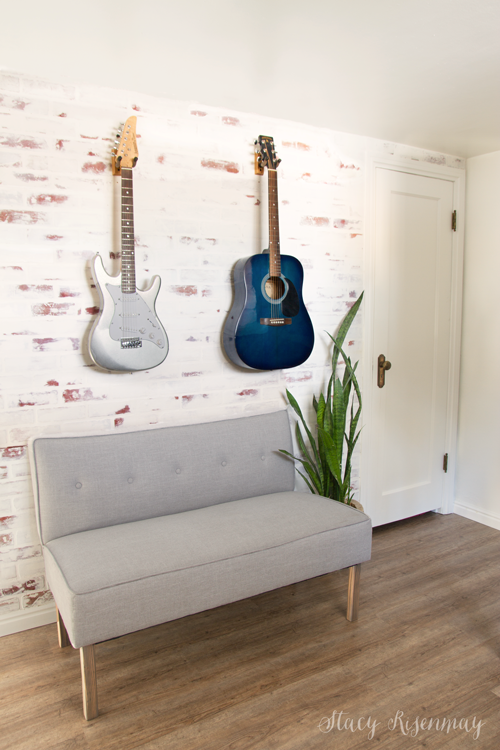
When I was planning out the details for my sons' room, I was worried that with white walls and black beds (you can see the bed reveals here!) that the room would see too stark. I wanted to do a feature wall to help soften things up. I have loved the look of German schmear brick for a long time and decided this was the perfect place to add it in our home.
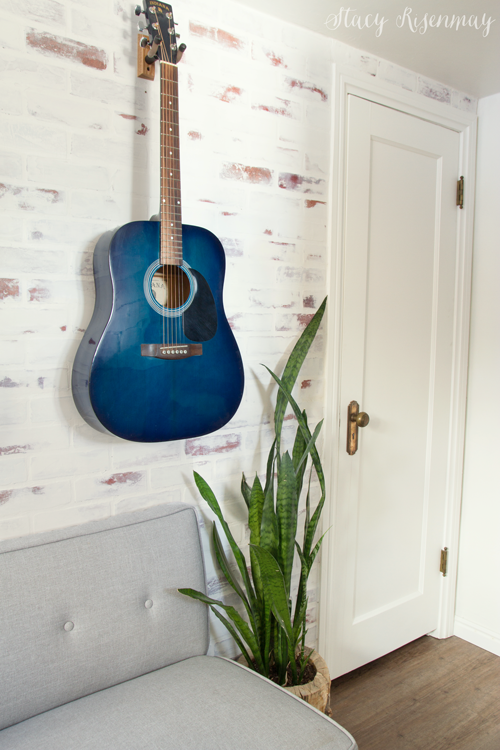
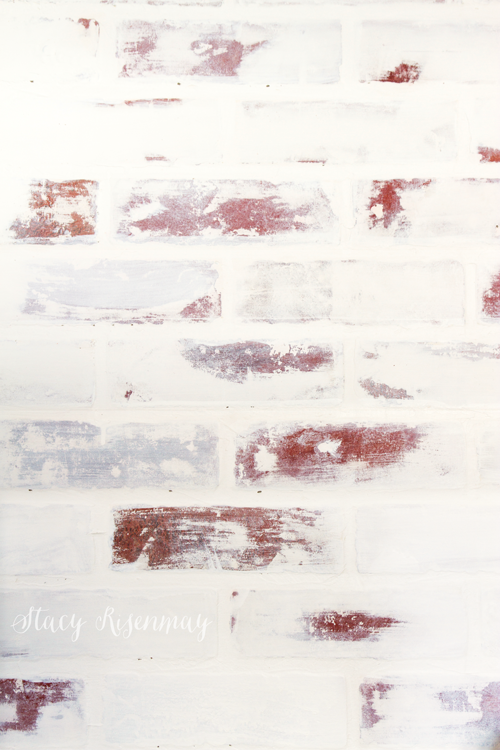
I wanted the wall mostly white to "blend" in a bit more instead of having a high contrast between it and the rest of the walls. This wall is so hard to photograph because of the window across from it, and the wall looks a lot better in person. It adds to the urban vibe I was going for, for this teen and tween room.
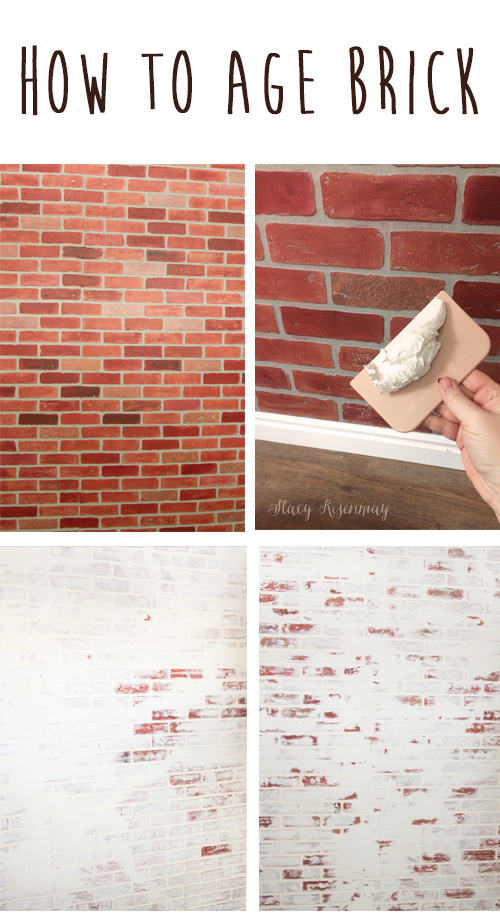
I bought those inexpensive faux brick panels from Home Depot. I screwed them on to the wall.
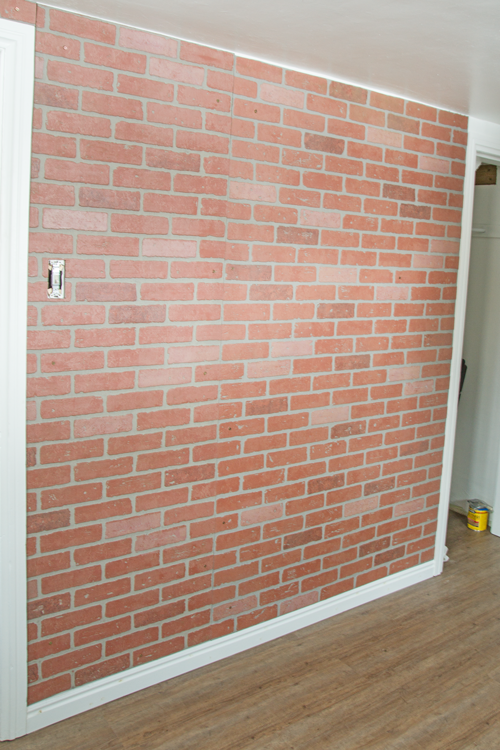
The bricks were a bit on the orange side and since I knew I would adding a deep red rug to the space, I decided to paint them a dark red.
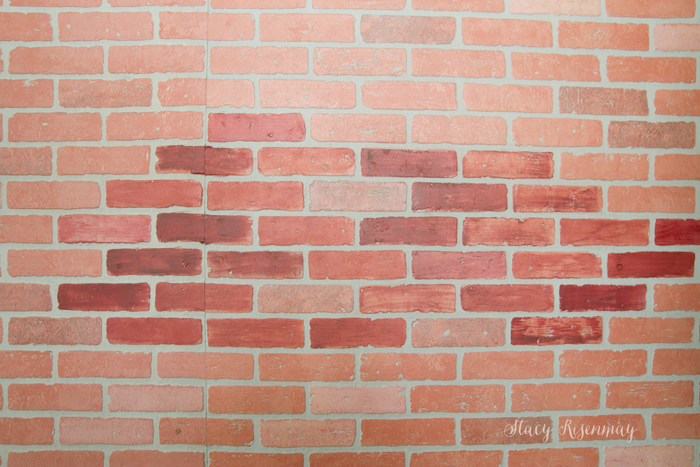
After the paint was dry, I added a thin layer drywall mud to the bricks. If you follow me on instagram and saw my insta story about this process, you know it looked a bit pink when I plastered over the painted bricks. For the most part, it dried normal. There were spots where the drywall mud mixed with the paint (it reconstituted it) and it made pink streaks. If I were to do this project again I would have either used a semi-gloss latex paint instead of a flat craft paint or I would have sealed it with a clear polyacrylic before plastering.
After the plaster was dry, I used a damp sponge to remove the plaster from some of the bricks. Drywall mud (or spackle) wipes off easily so it went pretty quickly.

Because the mud wipes off with a damp rag or sponge, you need to seal it somehow. You can use a clear polyacrylic or, the most common way, is to use watered down paint. I tried to avoid the painting the exposed bricks and kept a wet rag handy so I could blot and wipe away the paint if I accidentally got some on the red bricks. I had about 50% water and 50% paint and applied it with a foam brush. The paint also covered any areas that may have seemed a bit pink.
I wish you could all come over and see in in person. There are times when I realize how limited my photography skills really are and trying to shoot my dining room and this wall are both times I pull my hair out.
If you missed the post from last week revealing the beds I built, you can see them here:
I have one more tutorial post and them I will be revealing the whole room! I can't wait to share :)
PIN For Later:


This look is awesome with the beds you made! I thought about it and it makes perfect sense to have bricks in a house from the 1930's! Except you didn't have to hire a mason, lose space, or shell out a fortune to get the look! It's another win win in the Stacy column!!! Well done!!! :-)
Great idea and job!
Totally awesome!
As always, perfect. Love what you have shown so far. Lucky boys.
I know this is nothing to do with decor diy etc but i am curious how your boys decided who would share their rooms with > Nosey ? yes.
I really like this wall treatment and can think of any number of applications for this. Thank you again for a very versatile idea.
Never would have thought to do such a thing, but it turned out great. Really interesting wall treatment, and looks great with the rest of the room. Nice transition for your boys, who are growing up so fast. Guitars look great as art work on the walls.
You are one talented gal!...The wall looks wonderful...
I love the technique of the "German Shmeer" I think it look so elegant, classy, old (but in a good way) and it's just a pretty thing to look at! I really enjoyed this post, thank you for sharing!
I really like this look. I am looking around my house trying to decide if it will work for me.
Looks great! I did the same faux brick wall in my living/dining room!
Tania
What an excellent idea, and a fabulous one to. Thanks for sharing.
Oh goodness... what an incredible outcome on this wall! So smitten... you have me dreaming here...
I've featured this in this weekend's DIY Salvaged Junk Projects. Thanks for linking up! :)
Stacy,
Genius !!!!!
Gorgeous !!!!
Love it!!! I found you at Funky Junk.
Lisa
I have a faux brick flooring that I hate, do you think a floor could use this treatment ? It really is beautiful.
my last comment was messed up so I am trying again.
Lisa