• Skip to primary navigation
  • Skip to main content
  • Skip to primary sidebar
  • Skip to footer
Stacy Risenmay
  • Home
  • About me
  • PRESS
  • Contact Me
  • My Book
    • Facebook
    • Instagram
    • Pinterest
    • Twitter
menu icon
go to homepage
subscribe
search icon
Homepage link
  • Home
  • About me
  • Project Gallery
  • Our House
  • PRESS
  • Contact Me
  • Privacy Policy
    • Facebook
    • Instagram
    • Pinterest
    • Twitter
  • ×

    Corbel Tutorial

    By Stacy 29 Comments

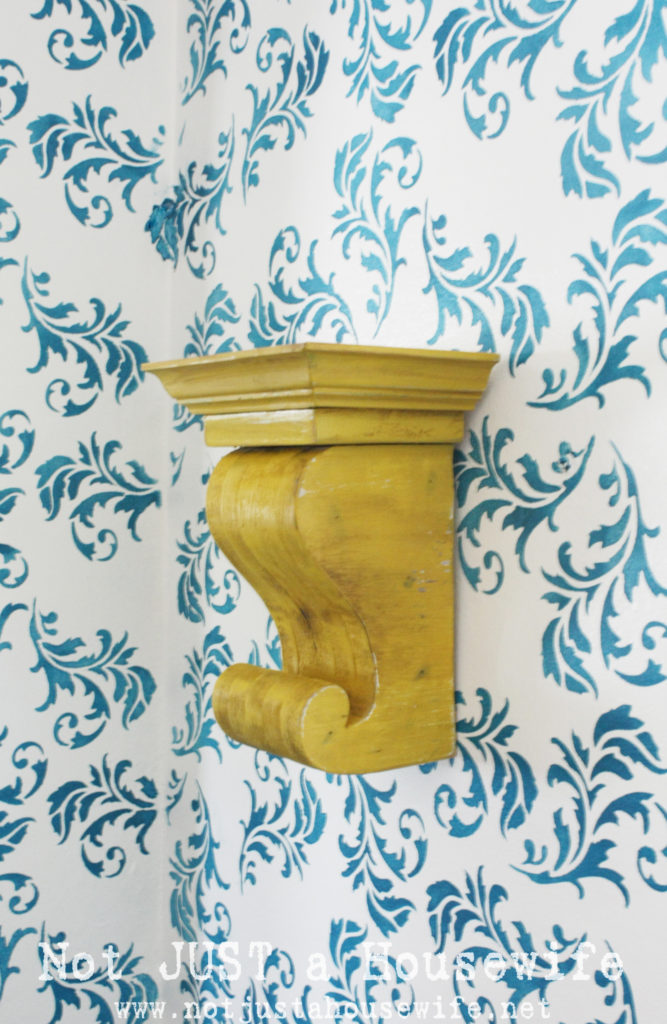
    Alright. Here is the tutorial for the corbel in my hallway.  P.S., I am moving the hallway decor to the laundry room. I have a good sized SUNNY laundry room that needs a major over haul and I think it would be a perfect fit :)

    Okay, the tutorial!

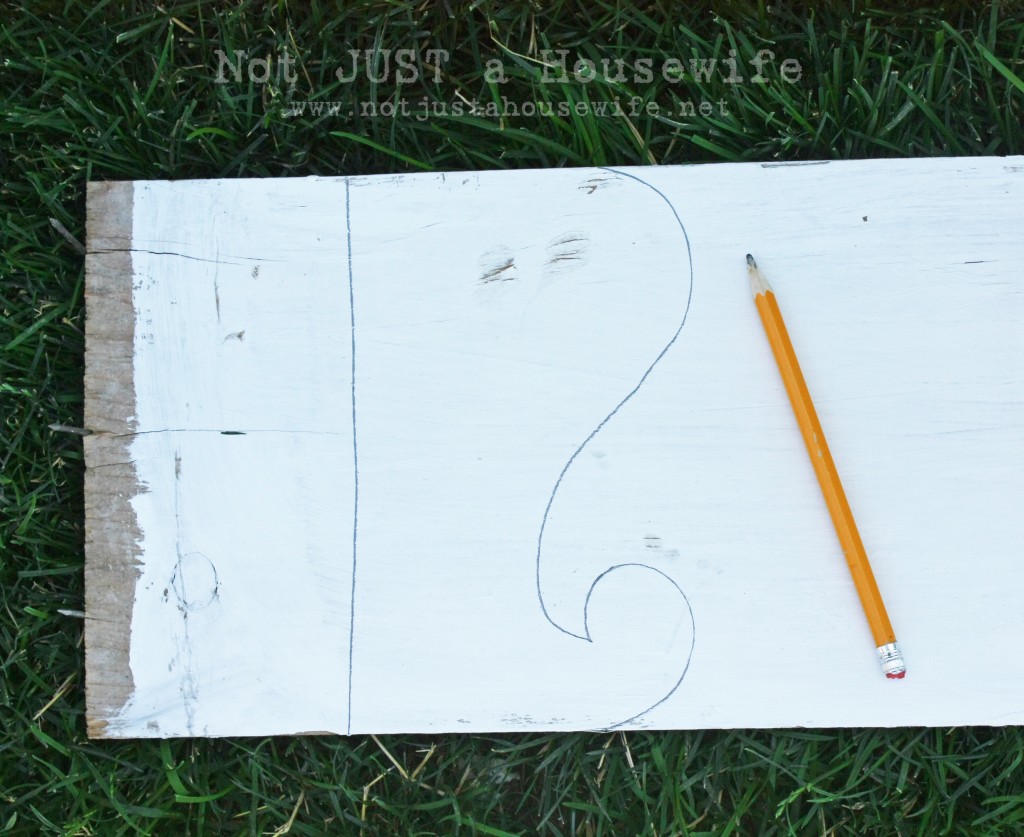
    I got an old  board from our garage. I free handed a design. It could be anything you want. You can find example online or dream up your own.

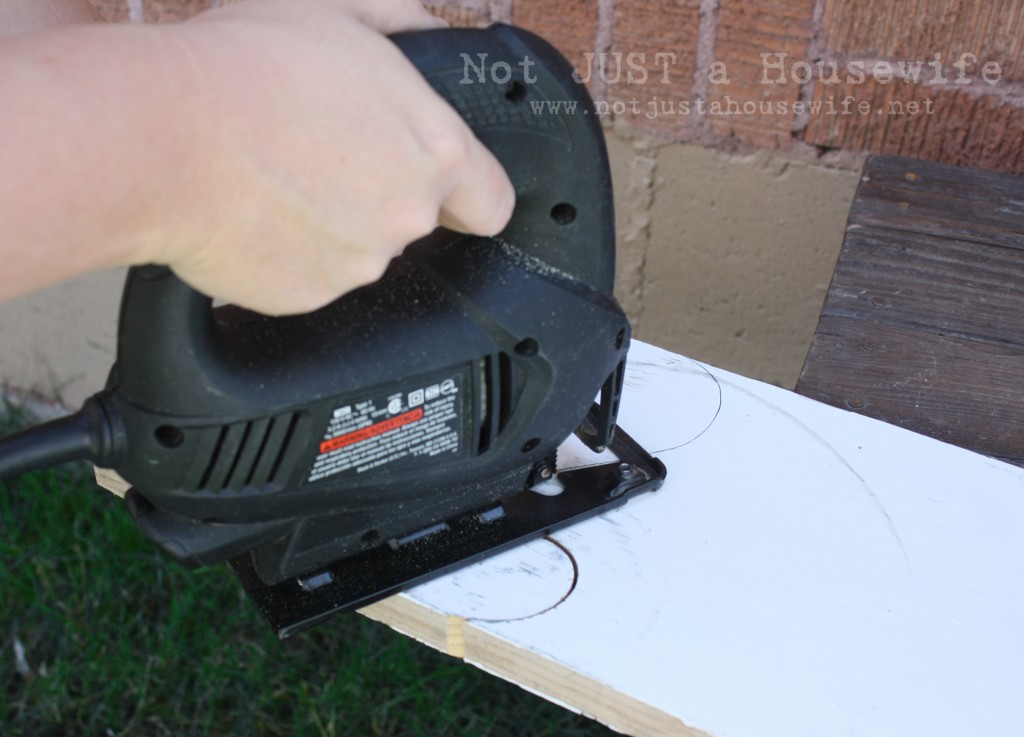
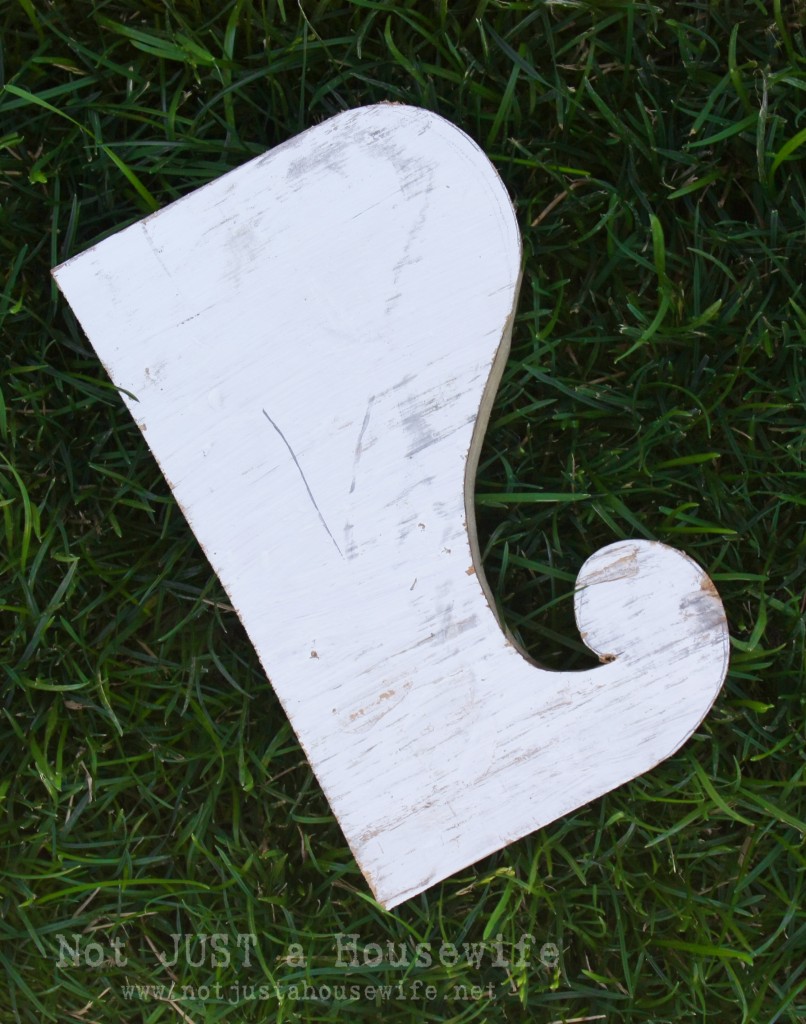
    I used my jigsaw to cut out the design. (I heart my $20 jigsaw)

    Then I repeated this step 4 more times so that I ended up with 5 of these. I labeled the first one with a one so that I could use that as the pattern every time. Cause a copy of a copy just isn't the same. If you have seen Multiplicity the you know what I mean :)

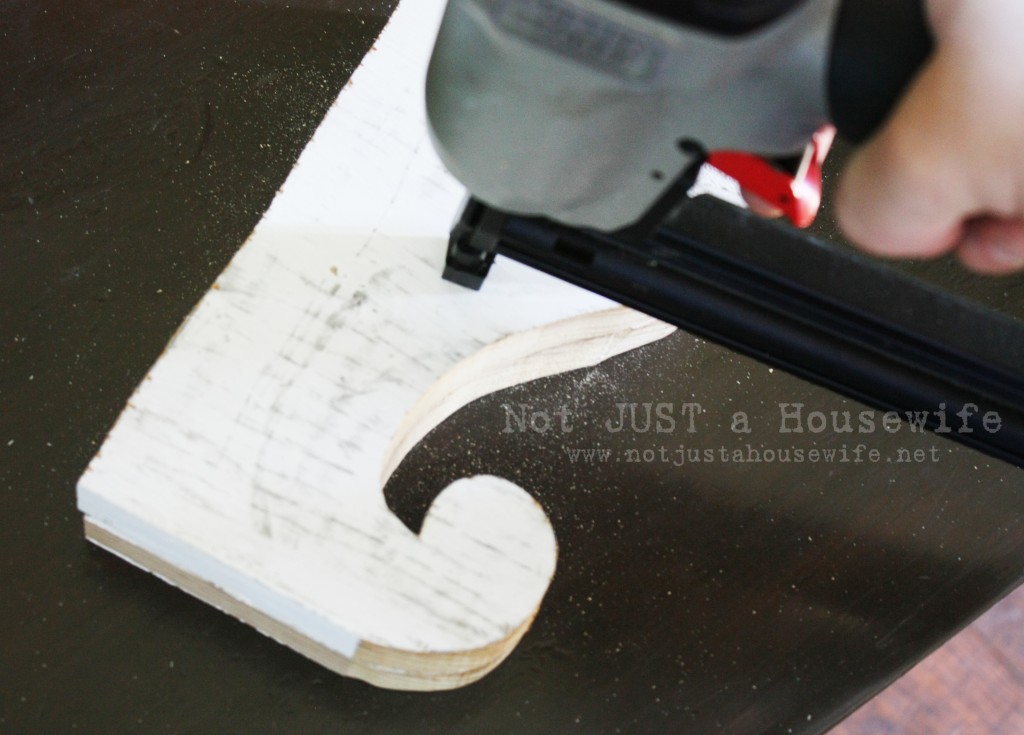
    I used my brad nailer (nail gun) to attach them together, one by one.

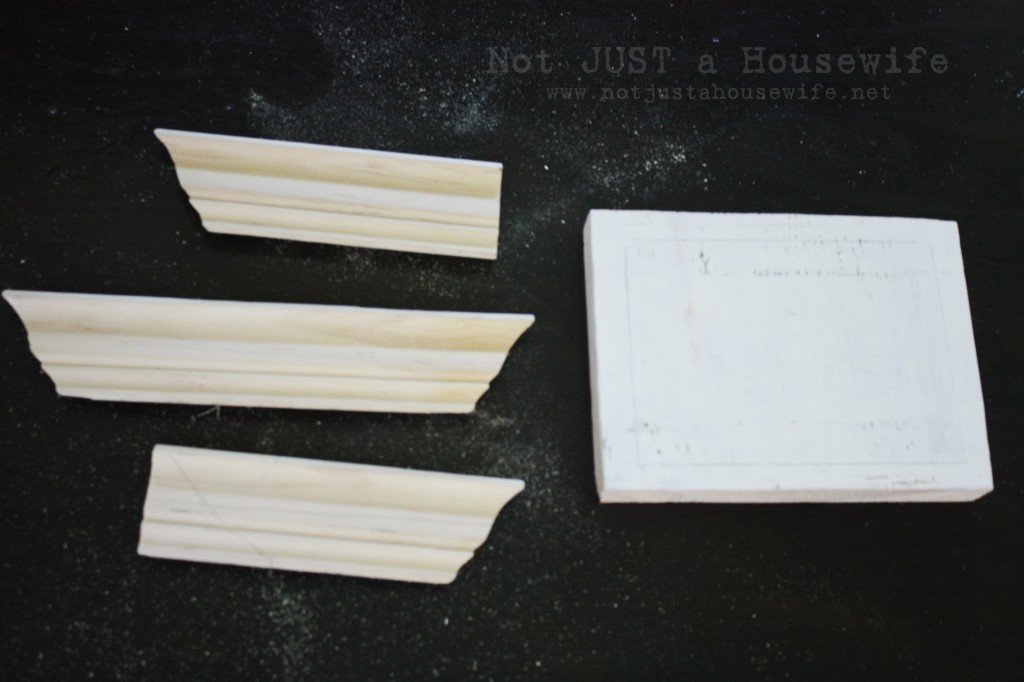
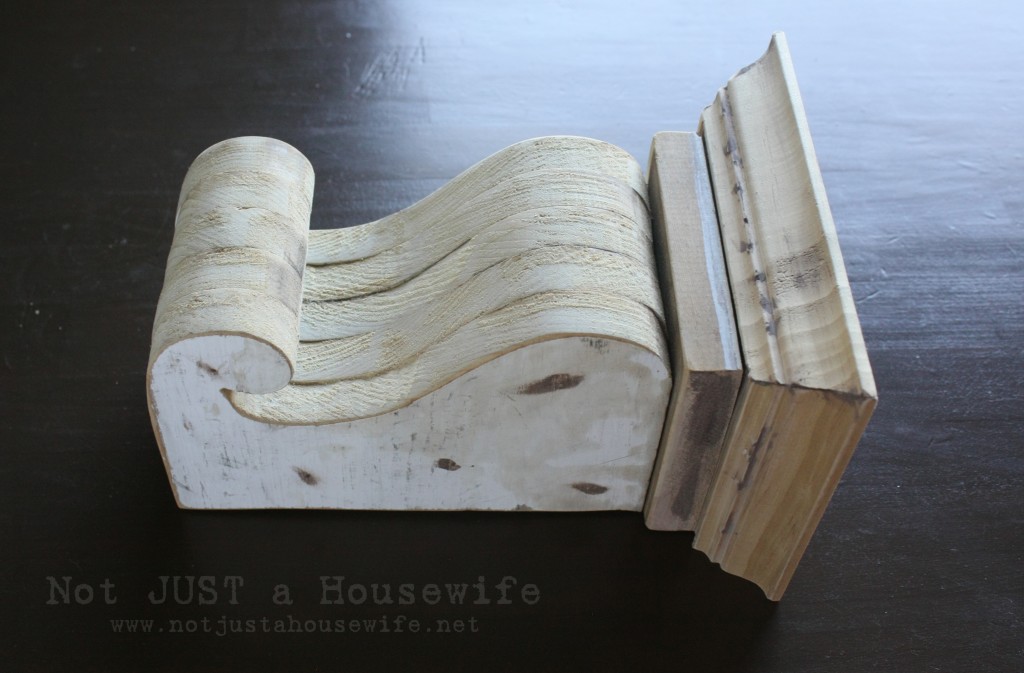
    I had a piece of molding left over from my kitchen redesign so I cut it at 45 degree angles. I also cut out a rectangle that they would be nailed to.

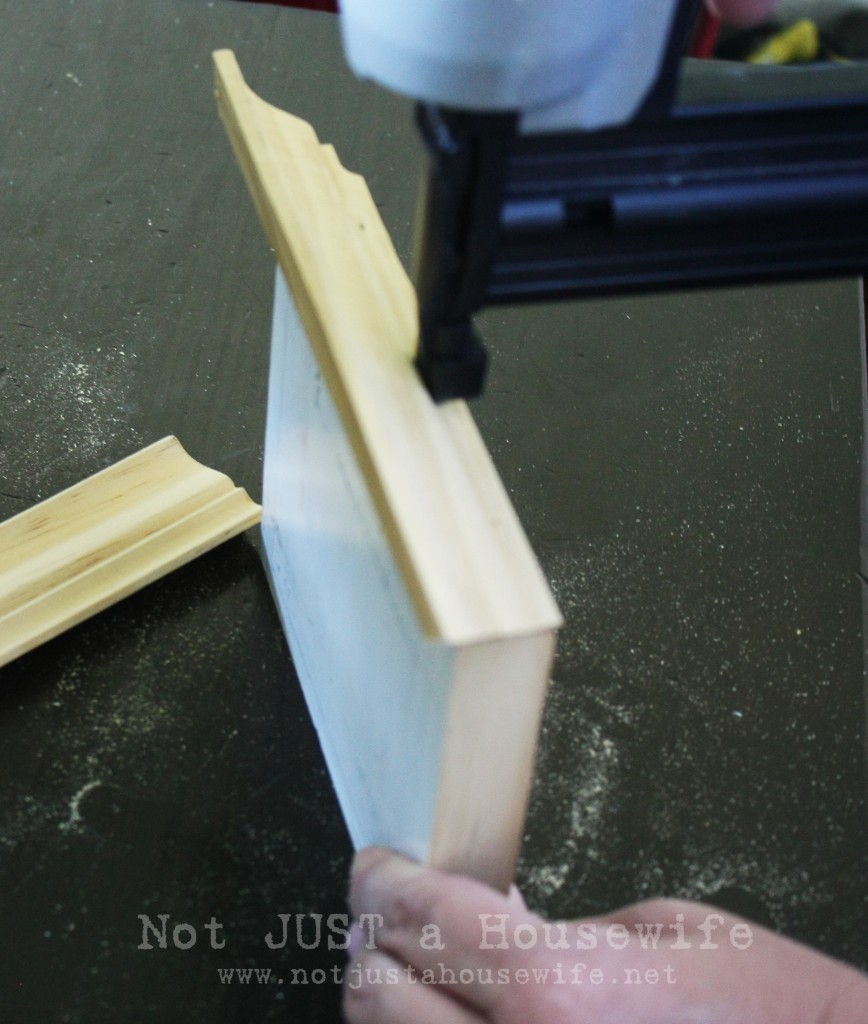
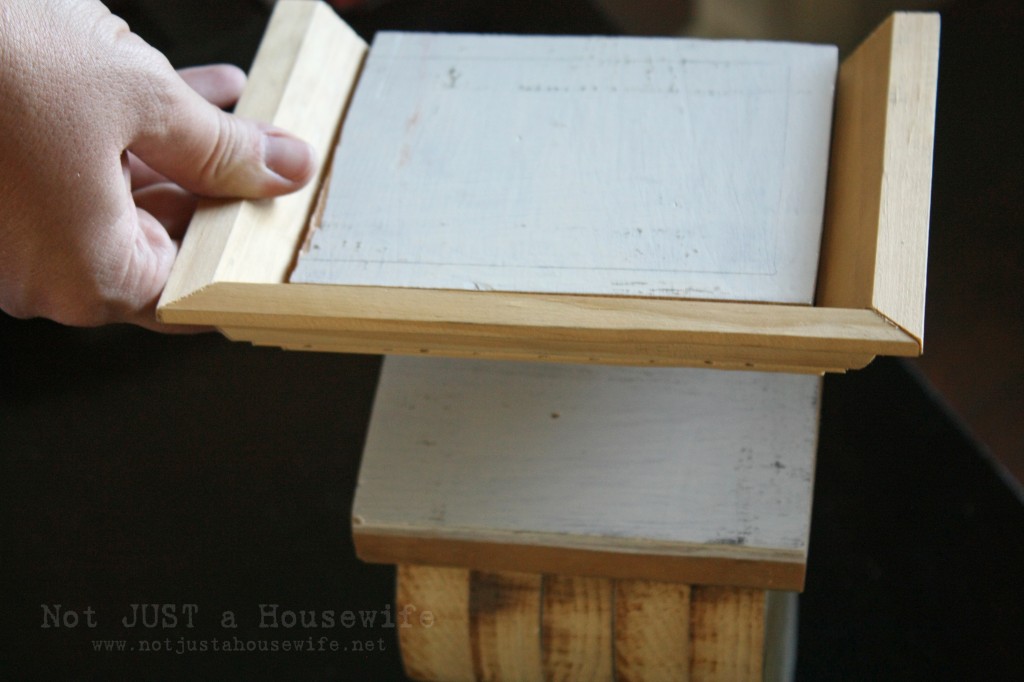
    I cut out another rectangle piece that was slightly smaller that the top piece with the molding. It got nailed on first. Then the top piece got nailed to that.

    Here it is all nailed together! I puttied the nail holes and then sanded it smooth. Not too smooth though. I wanted it to look old.

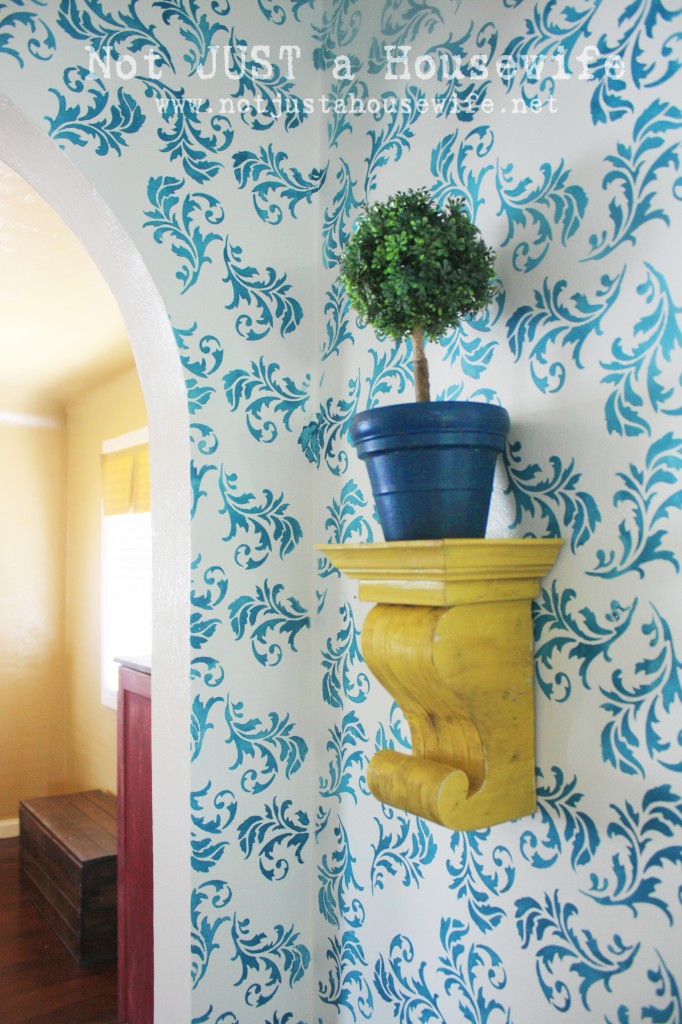
    I painted it this fun golden yellow and distressed it.

    It makes a fun addition to my hallway and cost me nothing to make! Hey, who doesn't like free???

    Pin It

    You will also like:

    • Building an Entryway BenchBuilding an Entryway Bench
    • Indoor Winter GardeningIndoor Winter Gardening
    • Pretending to be teenagers again......Pretending to be teenagers again......
    • Spring Painting Project (& an Announcement!)Spring Painting Project (& an Announcement!)
    • Gallery WallGallery Wall
    • Simple Fall Decor {Home Tour}Simple Fall Decor {Home Tour}
    • Merry Christmas!Merry Christmas!
    • Halloween Mantel Sign {Sprayer Giveaway!}Halloween Mantel Sign {Sprayer Giveaway!}

    « My Blogging Story
    Design Inspiration From Nature »

    Filed Under: DIY & Tutorials, Painting, Power Tools 29 Comments

    Subscribe

    for your weekly DIY fix.

    Reader Interactions

    Comments

    1. jester

      August 15, 2011 at 7:53 am

      I'm LOVIN it! Thanks for the tutorial!

      Reply
    2. Samantha

      August 15, 2011 at 8:55 am

      I am so glad you posted this! I was drooling over it when I saw it in your post the other day and mad at myself for not having any scrap wood big enough, but I DO have scrap wood big enough to do this! Thank You!

      Reply
    3. Claygirlsings

      August 15, 2011 at 10:17 am

      I never would have guessed. How clever!
      What did you do to hang it on the wall?

      Reply
    4. Kendra

      August 15, 2011 at 10:56 am

      Love it!!!!

      Reply
    5. catnap

      August 15, 2011 at 2:42 pm

      Clever and resourceful. I admire a woman who owns power tools and knows how to use them. I've got tool envy.

      Reply
    6. Lucy

      August 15, 2011 at 3:49 pm

      Genius!! I love love love this!

      Reply
    7. Karen

      August 15, 2011 at 10:12 pm

      You amaze me!!!

      Reply
    8. Alicia

      August 17, 2011 at 1:17 pm

      This is genious! I've been looking around for corbels to fit a certain place in my house and can't find the right size. Ahah! Now I can make my own! I love you and your blog! You are awesome :)
      Alicia @ http://www.thriftyandchic.com

      Reply
    9. somedaycrafts

      August 20, 2011 at 6:35 pm

      I loved this when I saw it at Tatertots! I am featuring it tonight at somedaycrafts.blogspot.com. This rocks!

      Reply
    10. Lauren

      August 20, 2011 at 6:42 pm

      I love that! What a great color as well!

      Reply
    11. Beth@A2Z

      August 20, 2011 at 7:34 pm

      Um...amazing. I love it! I'll be featuring your project over on Tip Junkie Decorate :). xoxo, Beth

      Reply
    12. Vivienne @ The V Spot

      August 20, 2011 at 9:35 pm

      Unbeeeelievable. You're amazing! This looks fantastic!

      Reply
    13. Pattie @ On Hollyhock Farm

      August 21, 2011 at 6:29 am

      Wow! Thanks so much for sharing this! I would never have thought of that! Excellent.

      Reply
    14. Nancy @ dream it... build it... style it!

      August 21, 2011 at 1:04 pm

      Great idea! Looks fantastic:)

      Reply
    15. Hilary @ KatrinkaJane

      August 21, 2011 at 3:48 pm

      What kind of jigsaw is it? I'd love to know I can spend $20 for a tool that works well. :)

      Reply
    16. Mandi

      August 21, 2011 at 4:49 pm

      Oh my goodness HOW SMART!!! I love it!

      Reply
    17. Heather@The Black's Best

      August 21, 2011 at 5:16 pm

      This is awesome...and I absolutely love that it was free! That mustard yellow and aging adds a ton of character too.

      Reply
    18. rebecca Nordyke

      August 21, 2011 at 5:57 pm

      I thought of Multiplicity before you even referenced it! Love that movie. Hi Steve!

      Reply
    19. Surround sound system

      September 06, 2011 at 1:04 am

      Bright and ingenious. I esteem a lady who own authority gear and know how to use them. I’ve get instrument jealousy.

      Reply
    20. Pat

      September 20, 2011 at 8:12 am

      Hey there,
      Absolutely loved your blog and your creative genius. You amaze me. I tracked your blog through your stenciled ceiling shown in Better homes. My question to you is ..is that wall paper or another stencil & blue paint you used for the walls? Where can I get a similar design stencil?
      Thanks so much. You rock!
      Cheers
      Pat

      Reply
    21. Shawn

      September 21, 2011 at 1:55 am

      I did almost the same design in our house but instead of putting them all together I drilled 2'' diameter holes in the upper part and used them and dowels as curtain rods. After threading the dowel through the curtain I put it in the corbel on onside then the other. I then made finials out of store bought wood balls and double ended screws and placed those on the outside ends of the dowels. It really added substantial heft to my widow dressing since the windows were floor to ceiling and everything else we put up looked lacking.

      Reply
    22. Leanne

      April 27, 2012 at 7:09 am

      Love this!! I want to make several for my kitchen but I'm not sure how to attach it to the wall- how did you?? Thanks!

      Reply
    23. Kathy

      April 29, 2012 at 6:06 pm

      Just found your blog, I love this corbel tutorial. Will be trying this! Thanks!

      Reply
    24. Theresa

      January 06, 2013 at 9:00 am

      OH WOW!! So creative! I would have never thought of this!! I love it!! See, I'm finding more and more on your blog that I gotta try!! Thanks again for sharing it all!! Hugs & Smiles, T

      Reply
    25. Rayana Botelho

      February 10, 2014 at 9:54 pm

      How clever! Good job :)

      Reply
    26. Sibylle

      March 22, 2014 at 3:22 am

      How did you attached the corbel to the wall?

      Reply
    27. Judi

      August 13, 2014 at 12:15 pm

      Hi there

      I just found your website, and am SO glad I did, as I've been wanting some corbels in my home for ages, but they're generally quite expensive, and as I just received a new scroll saw for my birthday, having found your tutorial I know what the first thing is I'm going to make with it. Thanks SO much for this really useful information.

      Judi in the UK

      Reply

    Trackbacks

    1. Sticky Business: Posts We Liked This Week | An Eclectic Blog says:
      August 20, 2011 at 11:44 pm

      [...] a touch of elegance to your home with this DIY corbel tutorial from Not Just a Housewife. This Old [...]

      Reply
    2. Panels Blog says:
      November 15, 2016 at 12:53 pm

      Faux Wood Exterior Corbels Make

      [...] ures of fixing up our tiny 1938 cottage. Whether it is big or small, I think eve [...]

      Reply

    Comment Below! Cancel reply

    Your email address will not be published. Required fields are marked *

    This site uses Akismet to reduce spam. Learn how your comment data is processed.

    Primary Sidebar

    stacyHey! I'm Stacy and am a DIY addict. I love to get my hands dirty, whether it's sawdust, paint, or dirt. My goal is to help YOU learn to fix up your home and yard. No matter the style or size, I think everyone should love their home. And it doesn't takes a big budget to get there. Let's DIY together!

    Subscribe to My Blog!

    Search this site

    categories


    Subscribe

    Footer

    Welcome! I'm sharing our adventures as we fix up our 1938 cottage. Whether it is big or small, I think everyone should love their home and I don't think it takes a lot of money to make a space your own

    About Stacy

    • Facebook
    • Instagram
    • Pinterest
    • Twitter

    My Favorites

    copyright

    All images and content are copyrighted via Stacy Risenmay unless otherwise stated. If you'd like to share my work, please link back to this blog.
    Thank you for visiting!


    Footer

    ↑ back to top

    About

    • Meet Stacy
    • Privacy Policy
    • Contact

    Categories 

    • Home Decor
    • Outdoor Projects & Gardening
    • DIY & Tutorials
    • Kid Activities
    • Recipes
    • Travel
    • Cleaning
    • Houseplants
    • Staining
    • Painting
    • Power Tools
    • Holiday Ideas

    Newsletter

    • Sign Up! for emails and updates

    As an Amazon Associate I earn from qualifying purchases.

    Copyright © 2020 Brunch Pro on the Brunch Pro Theme


    Privacy Policy
    Welcome! Thanks for visiting.
    Hi! I'm Stacy and I want to help YOU become a DIY rockstar! Sign up for my email list so each project, tip, and trick will go directly to your inbox :)
    Your information will *never* be shared or sold to a 3rd party. Pinky promise :)
    Welcome!
    Hi! I'm Stacy and I blog about fixing up our 1938 cottage. Join the thousand of others who get my posts sent to their inbox for FREE!
    Your information will *never* be shared or sold to a 3rd party.