
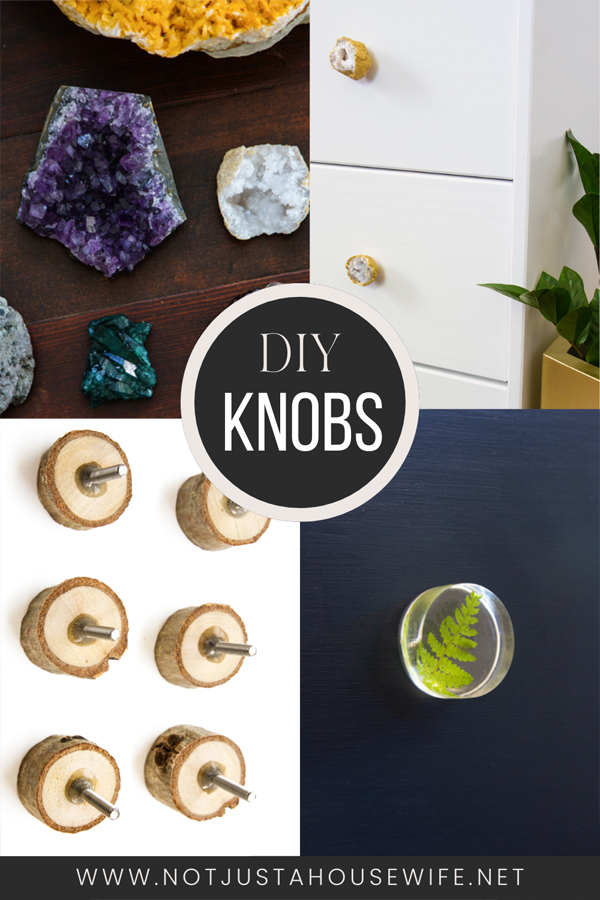
Over the years I have created some fun knobs for our dressers and cabinets. Making your own is an inexpensive way to customize furniture for the space based on your home decor style. Here are some of my favorite unique ideas for DIY drawer knobs!
This post contains affiliate links
DIY Drawer Knobs
We all over to see and old piece of furniture get new life with a makeover! It is fun to see it transform with new stain or paint. One part of the makeover that may not get the all. the attention at first, is the hardware. There are TONS of options out there, but have you ever considered making your own?
Supplies:
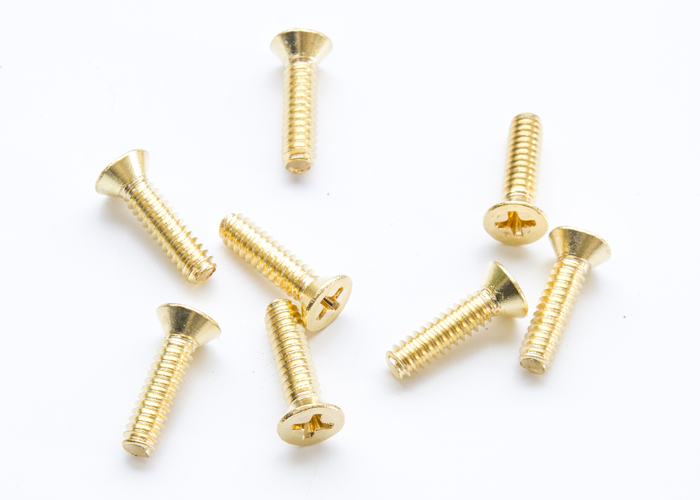
#8-32 Machine Screws (Flat Head)
Hex Machine Screw Nut or Cap Nut (Optional)
Drill & Drill Bit
Let's Talk About Screws
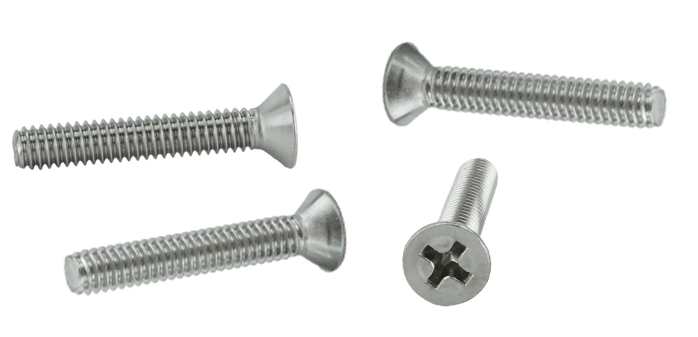
The standard size screw for cabinet hardware is a #8-32 screw in whatever length is needed. If you are using existing screw holes in the cabinet door or drawer front, you will need to verify that it is in fact the right size. Some knobs get screwed part way into the drawer front while others go all the way through. It depends on the thickness of the drawer or cabinet door and they design of the original knob. If the hole goes all the way through, you will need to have the screw a bit longer than the depth of the wood and then attach a nut on the end. This is the most secure way to keep the DIY knob attached. If you are adding new holes, you can decide which size or type of screw you use.
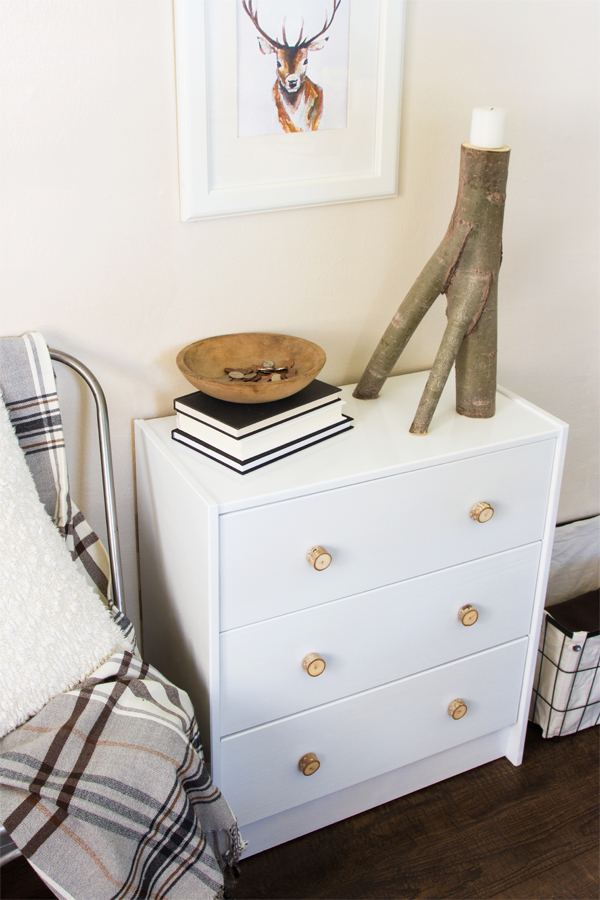
Wood Slices
I made these wood knobs for my son's mountain themed bedroom. They are perfect for a rustic feel. You could even use driftwood for a more beachy vibe. The species of wood used, the size and shape, will all make for unique knobs!
The first thing I did was grab some branches from our yard that had been trimmed off our tree. I used my miter saw to cut uniform pieces that were about and inch, or inch and a half across and deep. A miter saw is the easiest way to cut branches, but if you don't have access to one, you can use a hand saw, or jigsaw as well.
I sanded then a bit with a fine grit sandpaper to make sure there were no rough parts. You could seal them with poly if you wanted.
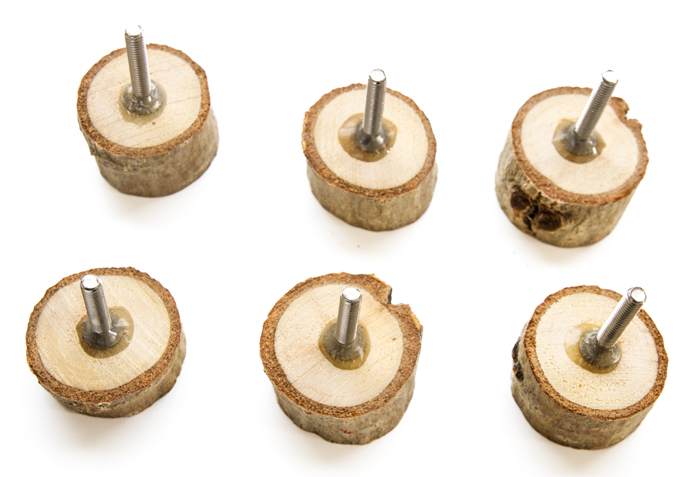
I used 2 part epoxy to attach the machine screws to the back of the wood slice. I prefer to get screws with a tapered, flat head so they lay better while the glue dries.
These lasted on my son's dresser for few years before a couple broke. I think if I were to make these again, I would have drilled a shallow hole in the back of the wood slice for the glue and screw head to fit in.
Geodes
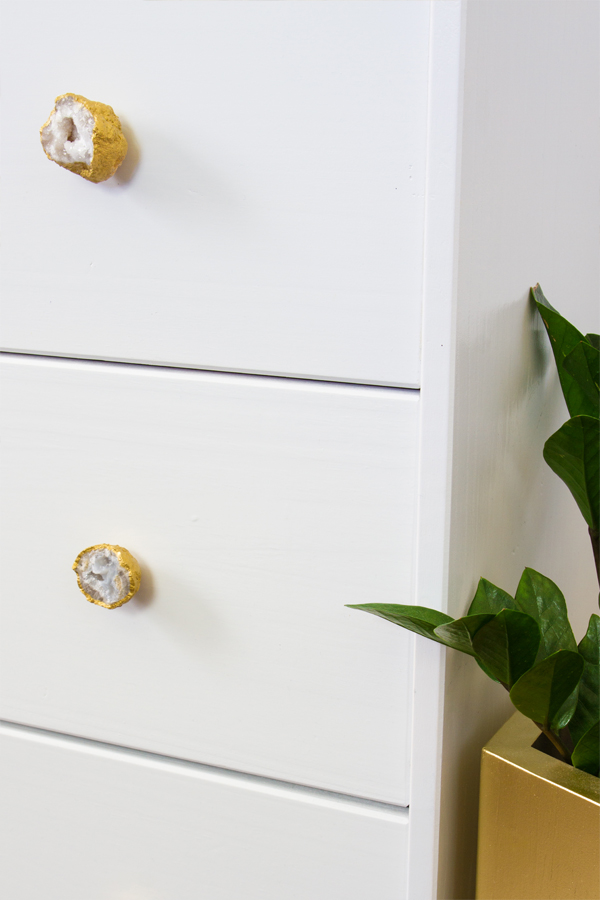
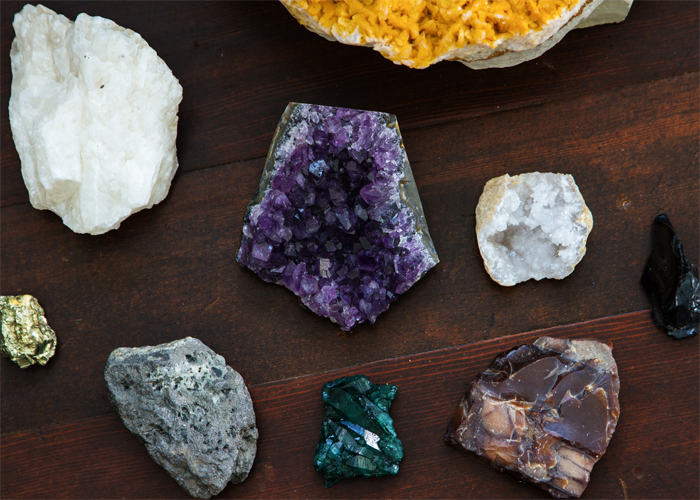
When my boys were little we used to order the "Break Your Own" geodes online and then have fun breaking them open with hammers. They would get so excited to see the crystals growing inside! Because of this, I had a lot of geodes that were all roughly the same size and shape. I decided to make some truly beautiful drawer knobs for a friend's dresser.
You could use just about any gem, mineral, geode, or rock. Think of how stunning a piece of furniture could be with a combination of colors!
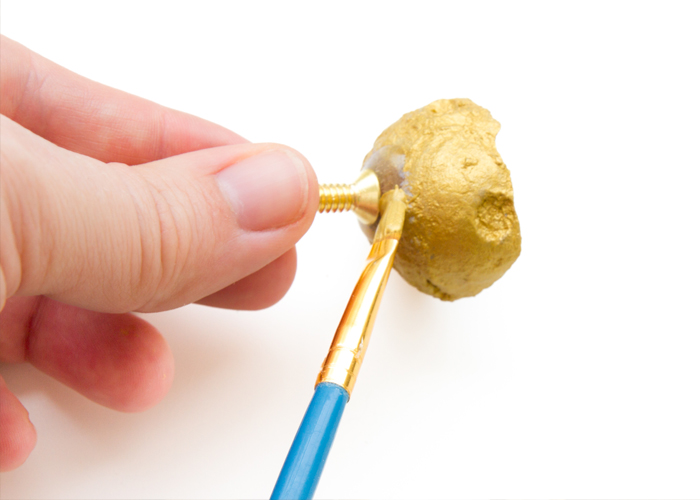
I decided to pain the plain, rough exterior of the geodes to be gold. I even bought gold machine screws! So once the 2 part epoxy was dry, I painted them so that the glue would blend in and look like it was part of the geode.
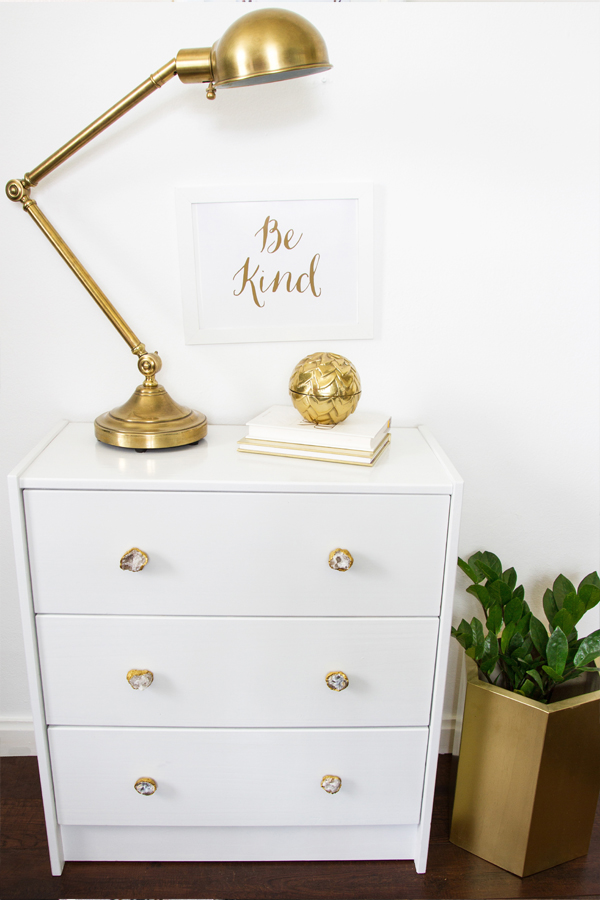
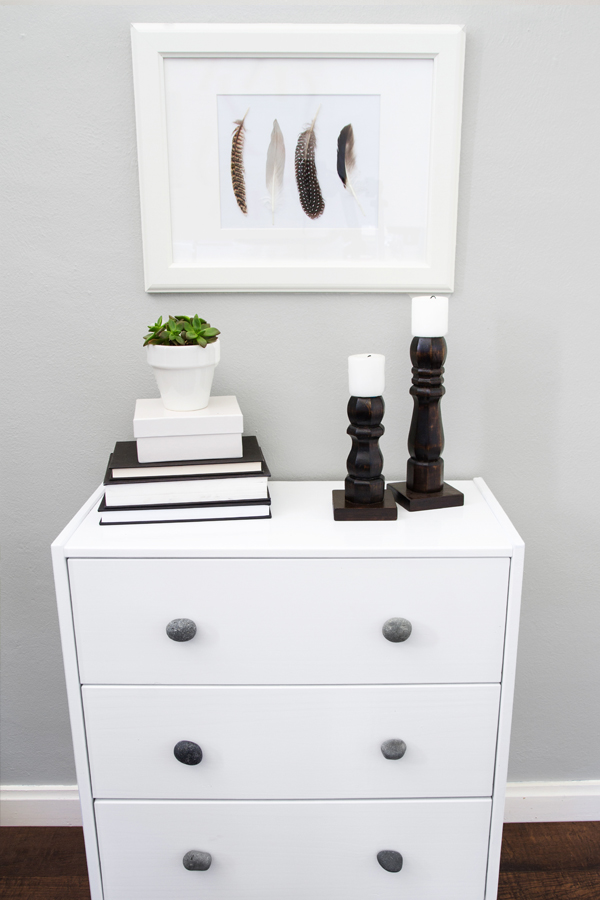
I love the way they look against the all white dresser!
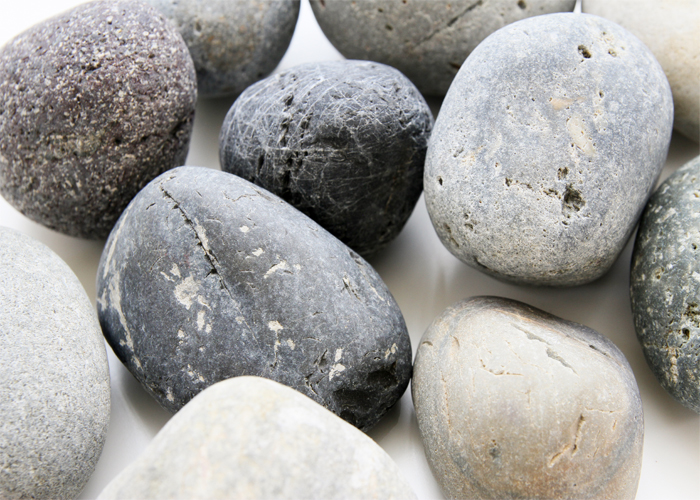
Rocks
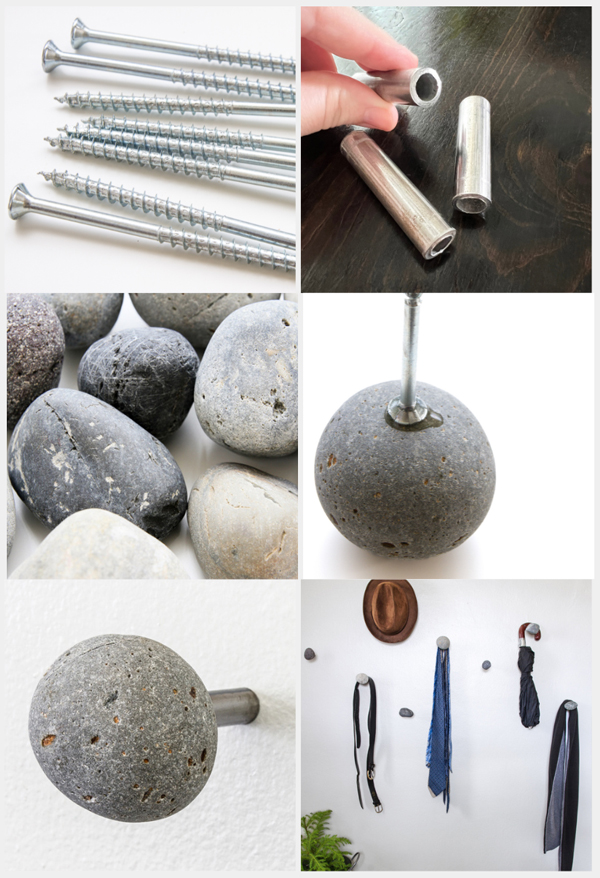
You don't need a fancy crystal or gem. You can use regular rocks as well! River rock or smooth rocks from the beach are perfect for this. When we visit a new place on vacation, we like to take a little something home with us to remember the trip. Sometimes it is a bit of sand, shells, or rocks. Whether you are buying river stones or you find rocks, they are a good item to use for your new knobs.
I had some larger rocks that were so smooth and pretty that I also decided to create wall hooks with them! I followed the same steps, except I used 4 inch long wood screws instead.
The wall hooks needed to stick out from the wall a bit. I also cut some metal pipe in 3 inch long pieces that slipped over the screw and served as a spacer. It also looked better than a skinny screw sticking out from the wall.
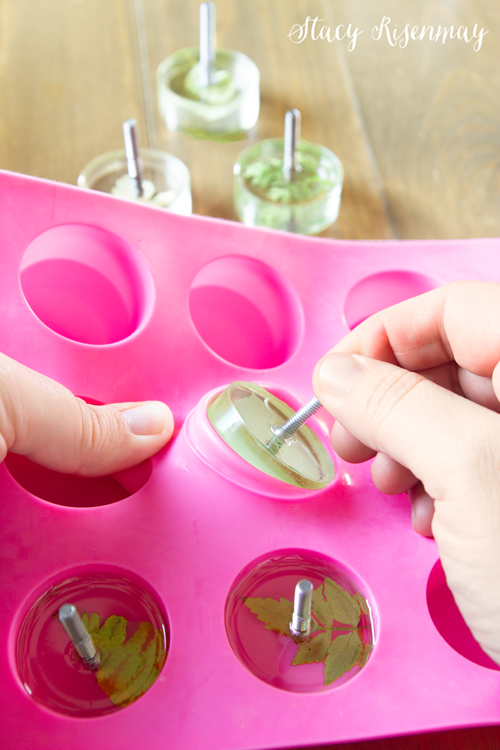
Resin
Several years ago I shared these resin DIY knobs. I had them on another dresser in our home and I loved how the green of the leaves looked against the dark blue paint of the dresser.
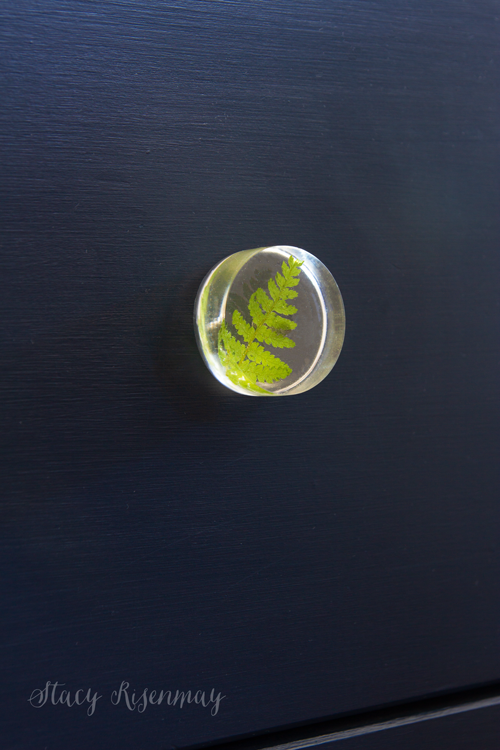
For the full tutorial on for these pressed leaf resin knobs, you can read THIS POST.
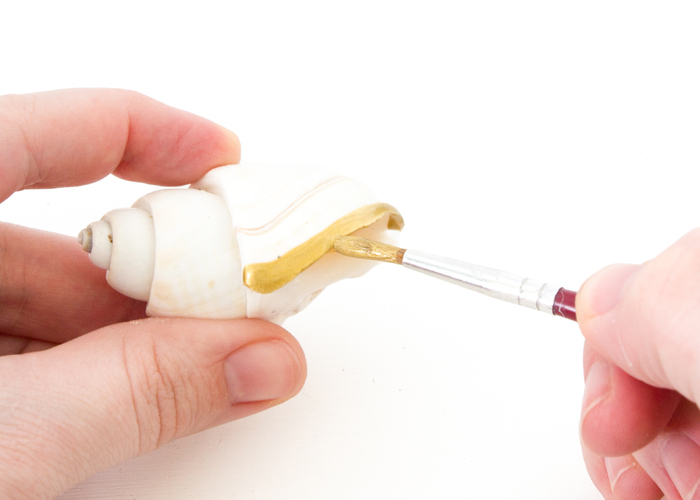
Shells
Shells are another fun thing to collect when traveling. I had left over gold screws from the geodes so I added a little gold detail to them.
I made these shell knobs using the same 2 part epoxy.
Other DIY Dresser Knob Ideas
The possibilities are almost endless when it comes to creating your own DIY version of cabinet knobs or dresser knobs. You could use small plastic toys, small ceramic knick knacks collected over the years, large buttons, coins, or napkin rings. Whether you buy them from the dollar store, antique store, or find them on a nature walk, making your own DIY drawer knobs is a great way to add some uniqueness to your space in a subtle way. You can add so much personality to a piece with these little touches!
What are some DIY ideas for knobs that you can think of? Have you ever made your own knobs before?


Comment Below!