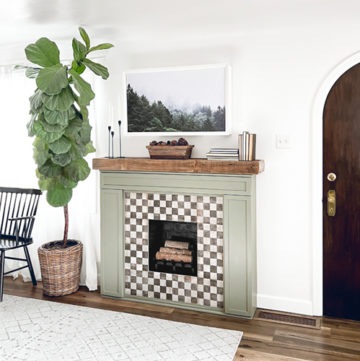
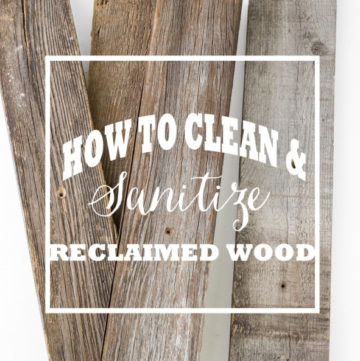
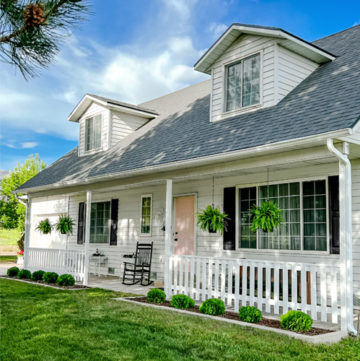
Spring Mantel

It finally stopped snowing here in Utah so I decided to finish my spring mantel. I didn’t have the motivation to do it when I was still snuggled up with the fireplace roaring. But it has been sunny for a week straight so to celebrate here is my springy, yellow, mantel!!!


spring-mantel-decor

Another reason I held off was I was waiting for my tulips in my flower beds to be ready to cut.  Aren’t white tulips so sexy? And what scream spring more than gingham? Maybe green grass?

To cover up my TV, I just sprayed some foam board with chalk board paint. It is easy to prop up in front of the TV when it is not in use and easy to take down when we want to see a show :)

spring-mantle-yellow

I realize that I still have not posted my fireplace tutorial (head hung in shame). I promise to get it posted soon.

spring-mantel-side

spring-mantel-brass-bunny

I love my wood box. I ordered it from Joss and Main. The bunny was from Hobby Lobby and he got a coat of brass paint.

spring-mantel-tulips

The vase is just a regular vase from the dollar store. I covered it in gold vinyl that I had left over from Christmas.

spring-mantle

Happy Spring!!!!

Home Stories A2Z

Part One: Finishing The Basement

If you remember back at the beginning of the year I did a post on our home goals for 2013. First up on the list is our basement bathroom.  Right now we only have one for all six of us! But before we can do any of the fun stuff, we had to get down and dirty!

The pipes are original to the house (1938) and have holes. They need to be replaced. In order to replace them we needed to tear down the ceiling so the plumber can access them. Our ceiling is made of lathe and plaster.

We wore shower caps (makes clean up faster for our hair), safety glasses, leather gloves, thick soled shoes, and a mask.

Next time I would probably wear a long sleeved shirt because I ended up with a few small scratches. It wasn’t a big deal but a long sleeved shirt would have helped. We always stand to the side when tearing down a section so we didn’t have issues with it falling on our heads but it might be a good idea to wear a hat as well.

SAFETY FIRST!!!

wear-mask-during-demo

(The outside was dark grey but the inside was white!)

This is what lathe and plaster lookS like in case you have not seen it before:

lathe-plaster-ceiling

We used a crowbar and hammer to remove the ceiling. The lathe (the boards) is held on by tiny nails. Once you pry one end off you can pull the rest down. The plaster will come off in chunks with it.

Be careful where you step because not only are the ends of the lathe pointy but they may have nails in them.

lathe-plaster-on-floor

We worked slowly and methodically because of all the pipes and wires. The plaster got thrown away and the lathe got added to my ever growing wood pile. I swept up what I could and then used the shop vac to get the rest of the dust. We had the whole thing done in a few hours.

tearing-down-a-lathe-and-plaster-ceiling

Sometimes progress isn’t pretty. But hey, it’s progress, right?

What is the dirtiest job you have ever tackled?  I would love to hear!

Office Closet Makeover {The Big Reveal!}

After surviving spring break with the kids home, two bouts of the stomach flu, and what seemed like endless days of dark gloomy skies, I FINALLY had a day where I could do a photo shoot for my office closet makeover. We had a sunny day and my husband was home to wrangle the kids :)

office-closet-collage2

I think I need to give you a little reminder of what it looked like before. It was bad. Brace yourselves….

closet-before

So you can see why I needed to overhaul the whole thing, right? And sad but true, this “before” was actually after I had bought totes and sort of organized it. The problem was that the totes were piled so deep in the shelves that I had to unload them all to get to the totes that were in the back. It was not very functional I needed to somehow get everything out front and center.

peg-board-tools

One of the ways I did that was by adding pegboard. I was not utilizing the wall space across from the shelves before. So by adding the pegboard, I instantly added a TON of storage. And the best part is that everything is right there and easy to grab. No more unloading a million totes to find something.

upclose-closet

I bought the pegboard from Home Depot and decided to keep it white since the wall were a darker color (Peacock Blue by Glidden mixed in Behr Ultra). The pegs, hooks, and baskets came in a “starter kit” box that was a really good deal (also from HD). The baskets were black so I spray painted them silver to match everything else.

The turquoise long metal container started out white. It came from IKEA and I spray painted it. The smaller silver buckets also came from IKEA.

I love that the colors of the tools add to the fun :)

polka-dot-lamp-shade

I love my polka dot lamp shade :) I bought a basic white shade from IKEA. Then I cut out circles from vinyl and stuck them on the shade like stickers. I then spray painted it lightly. If you spray too much and it gets saturated, when you turn the light on the shade will look uneven.

office-closet-bins2

I love the bookshelf!!! I wanted the closet to look like the rest of the office as much as possible. So I bought the same baskets and canvas boxes. I built the peacock blue boxes out of scrap plywood and painted them. The light turquoise baskets are also from IKEA but they started out white. I spray painted them.

office(Do you see the same baskets and storage boxes?)

office-closet-diy

(I had to hang out the office window to get these shots! The closet in in the corner of the room and it was so hard to get his angle)

The shelves got a makeover too. The were just simple plywood shelves we put up soon after moving here. Functional but not pretty.  Added some molding and stained them with Walnut Gel Stain from Minwax. I put everything that didn’t fit in a cute bin on these shelves.  Because this is above the stairs that go to our basement it is on an angle. SO the top shelf is 41 inches deep, the middle  shelf is 31 inches deep and the bottom shelf is 21 inches deep.

paint-can-storage

Underneath the bottom shelf was shallow enough that I didn’t think it was worth adding a fourth shelf. But I wanted to take advantage of the space. I hung hooks under and put some empty paint cans filled with more DIY goodies in them. Did you know you can buy paint cans like this with out any paint? They were less than $5 each at Home Depot. And since my closet is all about DIY I thought they were fitting :) I cut out vinyl lettering to label them.

painting-and-staining-closet

Here are some of the during shots :) Even the floors got a makeover!

office-closet-revel

I know there is a ton of stuff crammed into this 3 foot by 3 foot closet, but it has made my DIY life so much easier! And I am even going to keep the door off because I like seeing it all organized and pretty.

To see my full office read this post. And to see my computer hutch I recently finished for my office read this post.

Hexagon Greenhouse

I was invited to join 7 other bloggers to create something for my home for a “Crafting for Charity” event through Homes.com. We each created something and picked a charity.  The blogger whose project wins the most votes, gets to give a $5,000 donation to their charity. The details (and the voting) are on the Homes.com Facebook page on the top where their tabs are. One voter will randomly be picked to win $500 :) So go vote!

I have always wanted an indoor greenhouse but the ones I have come across were too small. I decided to figure out a way to make one myself.

I was originally going to build one from scratch but when I found this 6 foot curio cabinet on our local classifieds for only $25 I knew I couldn’t build one for that cheap. I came up with a plan to transform it into the greenhouse of my dreams :)

hexagon-greenhouse-pinterest

The curio was sadly outdated and very BLAH. But the shape was amazing and all that glass would be perfect for a greenhouse!

before-after-greenhouse2

open-hexgon-greenhouse2

hexagon-greenhouse

I actually have this in my bedroom right now. That might seem like a weird place for a green house, but my room is so sunny and I LOVE waking up and seeing it. Plants make me happy :)

I would love it if you would go and vote for my project on the Homes.com Facebook page. My charity is The Children’s Justice Center that provides care for abused children.

CFC_921_Blogger Contest Blog Graphic 550px

Armoire turned Computer Cabinet

We are probably the most un-tech savvy family ever. Everything we have is old. I just got my first cell phone a year and a half ago. And we still have a land line. So it was big deal for us to upgrade and get a new computer!

Our computer was almost 10 years old which in computer years is like 12,587. Sheesh! No wonder why it didn’t work.

We got our new computer from Staples. P.S. I was surprised at how many different things Staples carries. I think I am officially addicted to office supplies. My hubby and are were not super picky but we definitely wanted something with a lot of storage. Between taking pictures of my 4 kids to the blogging pics, I need STORAGE baby :) We got an HP and I love it! I am still trying to get used to Window 8 though. Please tell me it grows on you!

HP

(source: Staples)

So our new computer was going to need a home…..

007

When I finished my office over a year ago, the plan was to turn our old armoire into a computer hutch. Yeah…… It has sat there this whole time, almost empty. Why are the little, easy projects the ones I always put off? Getting the new computer was a much needed kick in the pants to get this project done.

This armoire was the very first piece of furniture my husband and I bought together. We had been married for a month. We used it for clothes since our tiny apartments had tiny closets.

Ever since we moved to this home (about 6 years ago) it has been kind of useless. It held random things. So I am happy to have it actually functioning now!

before-and-after-computer-hutch

The only thing I really had to do was add a sliding shelf for the keyboard and cut a hole in the back for cords. Easy, right?

I cut a 1″x12″ board to the right width, stained it to match, and added drawer slides to the sides. The drawer slides are about a 1/2 inch each so I subtracted an inch from the width of the inside of the hutch to figure out the width of the board.

One easy change and it has a whole new function!

COMPUTER-DESK2

I also decided to add some magnetic paint, chalkboard paint, cork board, and dry erase vinyl to the inside of the panel doors.

chalk-board-paint

(See our home phone? We are probably one of the last people in America to still have a land line :P)

The chalkboard section I put at the bottom because I figured my 3 year old would want to use it too. It is right at his level. I try hard to not be on the computer during the day very much, but if I am, he can be a little helper.

magnetic-paint

I happened to have some dry erase vinyl on hand but they also sell dry erase paint. Rustoleum is the brand, which is also the same brand as the chalkboard and magnetic paint. I had to paint 6 or 7 coats of the magnetic paint to get it to hold the big heavy magnet clips.

computer-armoire

The baskets on top and the file folders (I painted them blue) are from IKEA and the chair is the chair I painted. It has held up really well! The drawers hold printer paper an other supplies.

I am sure as I use this more and see what works and what doesn’t, that I can make little changes. But for now I am having fun with my new blogging space. I love that I can close the doors and the mess and work is hidden. I am kind of OCD like that, hence the desk with nothing on it! What about you? What is your work space like?

computer-hutch

Full disclosure, Staples provided me with this computer. The words and opinions expressed in this review are strictly my own. To see the full line of computers visit Staples.com.

Upholstered Bench

I built this bench when we first moved in this house which was long before I started blogging. We had poured all our money into buying the home and had very little left over to furnish it. We needed more seating so I used some particle board, a little foam, batting, some 4×4′s, and fabric I got for free to build a tufted upholstered bench.

When I redecorated my family room recently, I needed to reupholster it to match the new decor. It would have been a good idea to have taken a picture of it while it was torn apart but it was one of those “I forgot I was a blogger” moments that has me hitting my forehead and saying “DUH!” But I think it is simple enough that showing you the underneath and talking you through it you will totally get it. If not, you can email me and ask any other questions :)

loves-grows

I built a basic box. I have 4 little boys and little boys like to jump on things so I added boards across the center to give more support.

tufted-bench-underneath

I noticed that it had a little bit of a creaky noise if you moved around when sitting on it so I used caulk along to the seams to quiet that. It is one of my little secrets :) Caulk is awesome!

caulk-seams

I then cut a 4×4 post into the 4 legs and screwed them into place.

Before I added the foam and batting I measured where I wanted to buttons to be and drilled holes with a drill bit that was slightly bigger than the needle I would be using. For each button I drilled 2 holes next to each other about an 8th of an inch apart. Those holes are what the needle goes through when you tuft. And I did two so I could go up through one, then down through the other, and then tie a knot.

Then I cut a 4 inch thick piece of foam to fit the top of the bench. I wrapped batting over that to hide the seam between the wood and the foam.

Now the first time around my mom offered to sew the top because she is my mom and knows me well. I am not a very good seamstress. After breaking a record number of needles in Home Ec in Jr. High I was politely asked to just observe the others for the rest of the term….. seriously. BUT this time I was determined to try it on my own. After a quick lesson from my mom I did it myself! And unsupervised to boot. And I would love to point out that the fabric is STRIPED. Small stripes that were a bugger to line up and keep all pretty.

IMG_1702

(an instagram of me sewing the cover….my only proof I did it :P )

Since I barely survived sewing it, I do not think I am the right person to do a tutorial. If you need more info you can email me or search online for instructions. Or you could borrow my mom. She is pretty sweet :)

Not only did I conquer the stripes, but it fit like a glove. I slipped it on and then flipped the whole thing over. I used a stapler to attached the fabric to the underside. It took a long time. I wanted to make sure that the seam wasn’t being pulled more in one spot than another. I wanted everything straight as possible. And I had to make sure the corner seams were right at the corner of the bench.

Once it was all covered it was time to tuft.

I LOVE these little button kits. I buy them at WalMart. They make fabric cover buttons.

dritz-14-36(source: dritz.com)

I bought a big ‘ole needle at a fabric store. It is 8 inches long. I have heard of people using fishing line or coat thread as their thread but I actually used non waxed dental floss, doubled up. This is my third tufted project. The first that I did was about 8 years ago. Dental floss has always worked well for me. But you can use anything that is strong and doesn’t stretch.

Like I mentioned before, I stick the needle up through the bottom (hole #1), I thread the button on, and poke the needle through the top going down to the bottom again through the second hole.

I have a helper push down on the button (so that it has that indent you want with tufting) while I tie a triple knot below.  Ten buttons later I was done!

This project from start to finish is a big project. It is fairly simple but it is time consuming. But I am thankful I did it and have no regrets because I adore it. I also was able to have seating when we had very little money.

We also use it as an ottoman/coffee table when we need to. And my hubby and I  have also been known to play board games on it as well. I know, don’t be jealous of our super adventurous lifestyle…… We are pretty wild around here :P

family-room-bench-ottoman_edited-1

Where ever it is in the room, it is gorgeous!

 family-room-chair_edited-1


family-room-bench-coffee-table1

Which place is your favorite?

2013 Home Goals {WARNING: This is not pretty}

This is a post full of “before” shots. Some may even gross you out. But it is my reality. And my to-do list. And just think of how awesome the “after” shots will be :)

Oh man. I have so many projects that need to be done. They are not even “wants”. They seriously NEED to be done. We have mildew growing behind the tiles in our only working bathroom. Who ever tiled it before we moved in did not do a good job grouting and water has gotten behind there. They are bulging and I am afraid to tear it down for fear of what we will find. The sad thing is, since it is our only finished bathroom, we have to finish the basement bathroom first so we have a bathroom we can use while the upstairs tub/shower gets fixed. Uggg. Can you say expensive? And the tub is 70+ years old!!! All the outer shiny layer has long worn off and no matter how much I scrub it, it NEVER looks clean.

old-bath-tub

Before we can do the downstairs bathroom we have to address a pipe issue in the basement. We have a hole at the top bend of our sewer line. I have a rag stuffed in there for now so the horrible smell is contained. We need to have that and some other plumbing replaced.

laundry-before-collage2

Project #1 Have a plumber help us get the pipes replaced and fixed. I love to DIY but I also know when to call in a professional :)

Project #2 Build a wall and doorway to the bathroom, tile, and install new toilet. Then DECORATE the basement bath!

bathroom-before-collage

Project#3 tear out tile in shower. Rip out 70+ year old nasty tub, replace with new tub (*wishlist= acrylic claw footed tub), re-tile shower, install new tub

Project #4 Build a clubhouse for the boys. We have promised them one for a long time but the times my hubby has been laid off has always been spring or summer. It WILL happen this year!!!

If we get to this point in the list it will be a miracle. Those are not cheap projects!!! BUT just in case we win the lottery or a long lost Uncle kicks the bucket and leaves us loads of cash……..

Project #5 Tile the laundry room, fur out the walls, add wall treatment and trim, DECORATE

Project #6 Finish the “play room” slash “future master suite” which includes adding insulation, a ceiling, some electrical, furring the walls in places, boxing in duct work, adding two windows, and carpet. This one will be quite the challenge but will add so much livable square footage to our tiny home.

basement-before-collage

Project#7 Finish the fence in the backyard. My husband got laid off after we got one side done. Now that he has a job again I would love to be able to finish the other side and get them both stained so they match.

There are LOADS more things I would like to get done but it all comes down to money.  I will be super lucky to get even a portion of this list done. Maybe if we can get these things done 2014 can be the “year of the attic”.

What are your home goals for 2013? I would love to hear!

Fireplace Mantel Decor

My fireplace is one of my favorite things in my front room! Today I want to share with you the meaning behind the choices I made for my fireplace mantel. As you already know, I am a huge believer in decorating with meaning. I think you should surround yourself with items that have deep personal meaning and things that have a happy memory attached to it. Not every single thing in your home, but at least some :)

fireplaceThis is probably my favorite shot of the fireplace. I took a ton but this one stood out to me as “the shot”.

fireplace mantel decor

I will start with the clock. My mom collects clocks (among other things) and when we got married, my siblings and I all got to pick one of my mom’s clocks as a wedding present. I picked this antique mantel clock. I love it to pieces. I have to wind it once a week for it to keep time and I often forget. It has confused many visitors :)

brass pheasant

When I was a little girl my dad had a brass pheasant in his office. To be honest I never paid much attention to it. I knew it was there and that was about it. When my dad passed away from cancer when I was 15, some of his things were packed away. His pheasant fell and the tail broke off. When I was in the planning stages of my family room I knew I wanted to add more brass to the room to highlight the gorgeous brass door knob on my 1938 front door and the other brass elements in the room. My mind went immediately to the brass pheasant my dad had. I searched on ebay and was able to find several. I lucked out that they are not rare. I found one for a decent price and was THRILLED when it came. I teared up as I opened the carefully wrapped bird. It is such a little thing but it makes me smile when I see it on my mantel.

I have shared my love of the book Mandy before when I shared my secret garden. This was my favorite book as a child. It was what made me yearn for a small cottage of my own to decorate. I was gathering books for the mantel and discovered that under the paper cover it was the perfect shade of yellow for my room. It was meant to be! The other books are some I already had plus thrift store finds that I thought were fitting.

framed-key

This key is the original key to this house. Can you believe it still locks and unlocks the front door! We have a deadlock on there now and use that key so I framed this so it would not get lost. I ADORE old keys and was so delighted when we bought the house and discovered a small bag full of the original keys :)

The frame it is in was one we bought when we were newly weds. I have a thing for frames. I buy so many and will never have the wall space for them all. Can you say addiction? Well, we were window shopping and I spotted this frame. I LOVED it. We didn’t have very much money since we were still in college. I really wanted the biggest size. They were at a boutique and were very overpriced. We were ready to leave and my husband went back and grabbed the smallest sized frame and bought it for me. I will always love this frame.

topiary-painted

I love to garden and I love plants of every kind. That is why there are so many in my family room. I love to bring nature indoors. Plants just make me happy. I especially have a thing for topiary plants. I ordered some rosemary topiaries from Joss and Main. They were alive…. the real deal. I think when I opened them they took a deep breath of this DRY winter Utah air and went into distress. The were stunning and perfect. But I couldn’t keep them alive. I didn’t want to throw them out because even though the leaves had turned dark brown, they were still pretty and the leaves were still stuck on there. So I went to my trusty paint supply and guess what I found???

plant-color-spray

The hubby and I used this way back when he was in school for architecture because we had to build models complete with landscaping. We would make little trees and spray them with this. My habit of holding on to everything (cough, cough, hording, cough) paid off my friend. I taped the stems/trunk of the plant off and then sprayed them with this. The look great!!! They still look like they are alive :)

fireplace mantel decor

The tallest topiary is from a place called Tai Pan Trading. The harlequin pot is from Hobby Lobby, and the white flower pots are from IKEA.

Thank you for letting me share the story behind my fireplace mantel decor. Stay tuned for the tutorial on how I built the fireplace and what secrets it holds…….

How To Build A Card Catalog

I have always wanted a piece of furniture with a bunch of tiny drawers. My mom had a spice cabinet on the wall of our kitchen growing that I would hide all sorts of treasures in. As I grew up I wanted my boys to have something similar. What I really wanted was a card catalog.  I have actively searched for one for one for about three years. And the ones I found were either too big or too expensive. Every once in a while I would find a decently priced one on ebay but then I would notice the shipping. The shipping more often than not was more than the price of the cabinet!

So when I was in the planning stages of my family room renovation, I decided to figure out how to build one and make it look like an antique.

Before I show the tutorial, let me apologize for the crappy cell phone pics. I do a lot of my DIYing at night when my kids are in bed and since I was doing this project indoors (because of record low temps this winter) it got pretty dusty in my dining room so I didn’t want to pull out my nice camera. They won’t win any photography awards but you will get the idea :)

The building………

You basically start with a box. Make the dimensions fit your own space but be smart and make sure with the size that you choose, you will have the least amount of cutting possible to eliminate extra work. For example…..

I am old school. I should one day learn sketch-up or some other computer program but for now I really enjoy just drawing out my ideas on paper. I had it all done. The dimensions, shopping list, cut list, etc. And then I lost it. I was pretty confident that I remembered everything so I went to the store and bought the lumber. I had remember the width of the box being 18 inches. So that is how it was cut. But what it really was, was 18 inches on the inside of the box, not the outside. If I had made it 19 1/2 inches like it was suppose to be, the 1×6 boards I was using for the drawer fronts (which due to planing/sanding are really 5 1/2 inches) would have worked perfectly and I would not have had to cut them down. Instead, I ended up having to shave some off with a saw. Just something to think about when you are doing the math.

I went with a mitered joint since you would see the edges and because I was choosing to stain and not paint.

Then it is time to do the insert. You can do one of two things…..

Here are some lovely sketches. The first is just like the shoe cubbies you can buy for cheap at Target or Walmart that you put together your self. There are notches that slide together.

The second way is to screw the pieces together using a Kreg Jig. I used one on the barnwoood cupboard I built awhile ago and you can buy a small inexpensive one like the one I have.

Kreg R3 Jr. Pocket Hole Jig System

Here is a good look at the joint up close.

(image source)

If you go this route make sure and put the screws on the bottom so you will not see them. I know the drawers will be in the cubbies they create but it will just look better ( in case you take the drawer out) if the screws are hidden.

Okay, if you cut everything right your insert should slide right in. If it is too tight, just use a hand sander ( don’t use a belt sander since they eat through wood VERY quickly) and sand it down a bit. If it is too small and there are gaps, then cut a thin piece of wood to act as a shim between the box and the insert.

Luckily mine was a perfect fit :)

I then nailed it into place with my brad nailer. I draw a line across so I know where to nail.

This was the easy part. Now on the the tedious job of making all 12 drawers!

I cut all the the wood except for the ply wood I used for the drawers. Home Depot will cut wood for you so to cut down on my work load I decided to have them rip cut the ply wood into 4 1/2 inch strips. That way I just had to come home and use the miter saw to cut them to the right length. I do not have a table saw and this would eliminate having to mooch ask our neighbor to use theirs AGAIN.

I chose 1/4 inch plywood because the thinner the drawer sides the bigger the inside of the drawer. That was my reasoning. I had used 1/4 inch ply wood on my son’s floating side table drawer and it worked out pretty good. BUT I will say that it is very hard to nail the brad nail into such a thin board without it missing. I would recommend using 1/2 ply wood for the drawer sides, back and bottom.

I wanted the drawer to be shallower than the cubby it was going in so it could have some wiggle room. You don’t want it to be the same height or it will get stuck easily.

I cut the drawer fronts one at a time. I measured each individual cubby, then cut the drawer front for that specific cubby, and then labled it with a number. There are bound to be tiny imperfections ( something bog ones) so even if it only off my a 1/16th or 1/8th of an inch, it will look better if you cut them one at a time to have a nice fit.

I knew I was going to be sanding mine quite a bit to make it look aged so I was okay if the fit was a little tight. If you want to sand it, keep that in mind.

As far as how I got the drawer fronts to be nailed on with out too many nails missing their mark, I hot glued a tiny dot on each drawer and stick the front on. Once it was stuck, I drew a line (like shown above) to know where to nail. The thicker the wood the bigger the target and the less likely you are to have a nail miss. That is why the 1/2 inch would be easier.

I puttied the crap out of it. I always add more than maybe what I need because you can always sand it off, but that way you don’t have to go back and add more. ALWAYS use a paint-able, sand-able, stain-able putty. And pick the color closest to the color you will be staining. Especially if you are going to stain.

The staining…….

I wanted it to have an aged look. It is easy to get an aged look if you paint something. You either sand it or you glaze it (or both). Aging something stained is a whole other ball game. If you look at a real antique, it looks almost rubbed off. It is smooth and lighter in those areas. I had actually never tried to age a stained piece so this was an experiment for me.

I applied a thick coat of Minwax’s oil based stain in Dark Walnut. (This method will only work with oil based stain. Do not use water based) Instead of following the directions and letting it sit for a bit and then wiping off the excess stain, I let it sit for quite awhile. I let it sit to the point of it being almost dry. It was sticky. And very dark. You couldn’t see a lot of the wood grain. I then got a cloth and wiped it. I had to wipe hard and almost buff it because it was so sticky. And at first the fibers from the rag were sticking and I thought “Crap! What have I done?” But as I kept rubbing along the wood grain it began to get better.

I thought about the places that would normally get worn, like the edges, and the top where things would get set. I rubbed those areas more and it took off more stain. You have to play around with it. There were a few places I took too much off so I lightly brushed a little more stain over it and it was fine.

Once I got it to where I wanted it I let it completely dry over night. The next day I looked at it with fresh eyes and realized I wanted it a little more worn. Since the stain was dry at this point I got a very fine sand paper (220 grit) and ever so lightly sanded a few more spots. The sanding worked but didn’t look as good as the other way.

I normally use Minwax’s polyurethane to seal and finish off a piece but since I was going for a worn look and since antique stained pieces have a rubbed look, I decided to go with a wax this time. It requires a little more elbow grease to buff, but the look was perfection when I was done!

The hardware…….

I knew the kind of drawer pulls I wanted. I searched online and MAN! They were pricey. I needed twelve and I didn’t want to break the bank. While I was searching for them I saw on my friend Beth’s blog, that she had found the same style I was looking for at a really good price from a place called Van Dykes. I am not sure why or how the site works, but the prices vary all the time. I got the drawer pulls for like $1.20 each but today the price says $3.50 each and I think Beth got them for $2 something.

I knew they would be too shiny and new for my aged card catalog but I knew a trick…..

A long time ago my mom told me about soaking metal in ammonia to age it. I did it for the first time about 10 years ago on the yellow side table in my front room. So I did it again for these.

The first that will happen after a few days, is the clear ammonia will turn blue. Then clear coating will dissolve and they will look dull. After that is when it starts to get darker.

*A little tip….. If you don’t watch it close and it goes too dark, then you can stick it in new (clear) ammonia for a few seconds and it will lighten. And if you lighten it too much you can stick it back in the blue used ammonia. BUT be careful how long you let it soak because eventually it will eat through the metal coating down to the real metal it is made out of. These pulls were made out of copper and a few of them have the copper peeking through.

Gallery Wall in my Family Room

This was the first wall completed in my newly redecorated family room. And I love it. I love it because of the meaning behind a lot of the items. We call it our “favorite things” wall. And the best part is the kids got to help :)

 Here is a break down of why I chose the items and what they are.

I have always wanted to try to grow wheat grass. I heard it grew fast and I thought it would be fun for my kids to see it grow. My two youngest helped me plant the seeds. The grass lasts about 3-4 weeks before it outgrows the planter. We just replanted for the third time. Eventually we will plant something different but they still think it is fun to watch and they love to squirt it with a spray bottle.

I have a picture of the temple my husband and I were married in. We have wedding pictures in other areas of our home but I thought it would be another fun reminder to have a picture of the beautiful place where we said “I do.” I bought this print online from a local photographer.

The butterfly was another online find. I had a butterfly net growing up and for about 3 years in a row the only thing I did was collect bugs and butterflies to study. Now that I have four little boys that also love to catch them, I thought it was a fun thing to add.

I built this simple shadow box out of old fence pickets just like I built the cupboard to hide the light switch. I let my kids decide what would go in there. At first they wanted hot wheel cars and Lego figurines. But once I explained that it was more about memories and things that represented things we did, then they came up with these.

A sand dollar from our trip to the Oregon coast to represent our love of the beach.

There is a crystal because my husband and I both collected rocks growing up and now our boys do.

The bundle of sticks is because my boys are obsessed with them.  They collect them, make things out of them and I find them all over the place. When we moved to Las Vegas when my oldest was 2 years old he would look out the window and cry. He would say “Where are the sticks momma?” There was just gravel. My sister even sent him a care package with sticks in it. I have never seen a happier boy :)

The jar of buttons I helped come up with. My mom had a small antique box full of buttons when I was growing up. I use to sort them, play with them, and practice sewing with them. When I got married I bought a large jar and started collecting them. My kids LOVE to play with them too. We glue them to school projects, use them to learn to count to 100, and many other things.

I also put a small frame with the word “Service” in it. It is my word of the year/one word goal and I want our family to focus more on it this year. I also framed my favorite quote. It is something I want to teach my children and it serves as a good reminder for me as well.

I also added a door knob that is original to our home. Plus I ADORE door knobs :)

When I was all done with the wall my five year old told me that  this was his favorite wall in the whole house and that he was going to stare at it every time he walked in the room.

I think that means it is a success :)

This next photo I meant to add to the reveal post but forgot about it until I went back in to edit the rest of the photos. This is what my kitchen looked like for those days I was trying to do a photo shoot for the family room. I think it is pretty obvious it was neglected and used as the dumping grounds for everthing during the shoot. A bag of potting soil for the plants I put in the family room, paint cans for last minute touch ups, air compressor from the very last project, a tote full of decor items from the old room that need to go to the garage, and so much other STUFF!

Just keepin’ it real :P


On Monday I will be posting the tutorial for the card catalog I made for my front room. So check back for that! Have a fabulous weekend!!!

Photobucket